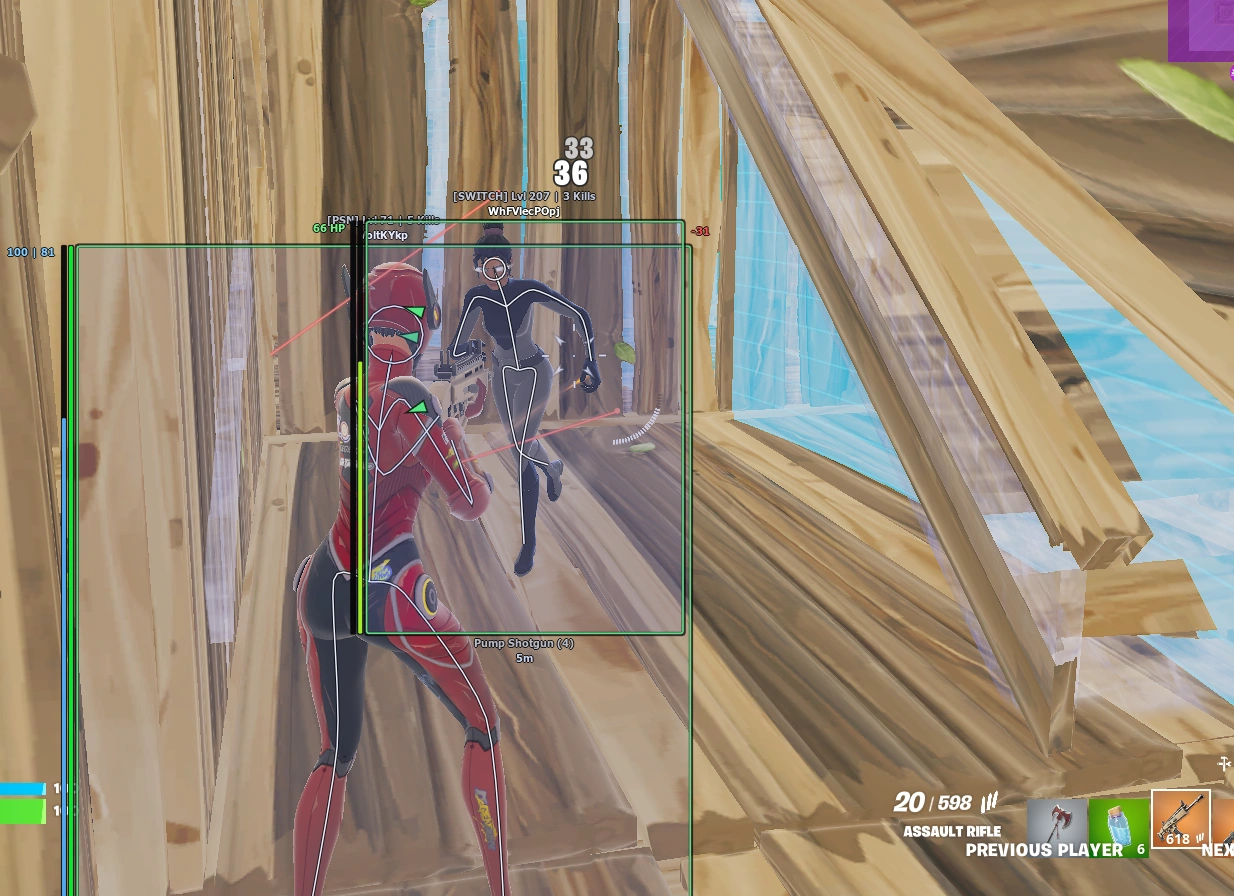
Arcane Squad
Arcane Squad
$4.99 – $39.99
Arena Breakout Infinite: Internal
$6.99 – $399.99
Installation Service
$6.99
Arc Raiders Internal
$7.99 – $399.99
Krush Arc Raiders External
$5.99 – $349.99
Krush Arc Raiders Internal
$6.99 – $399.99
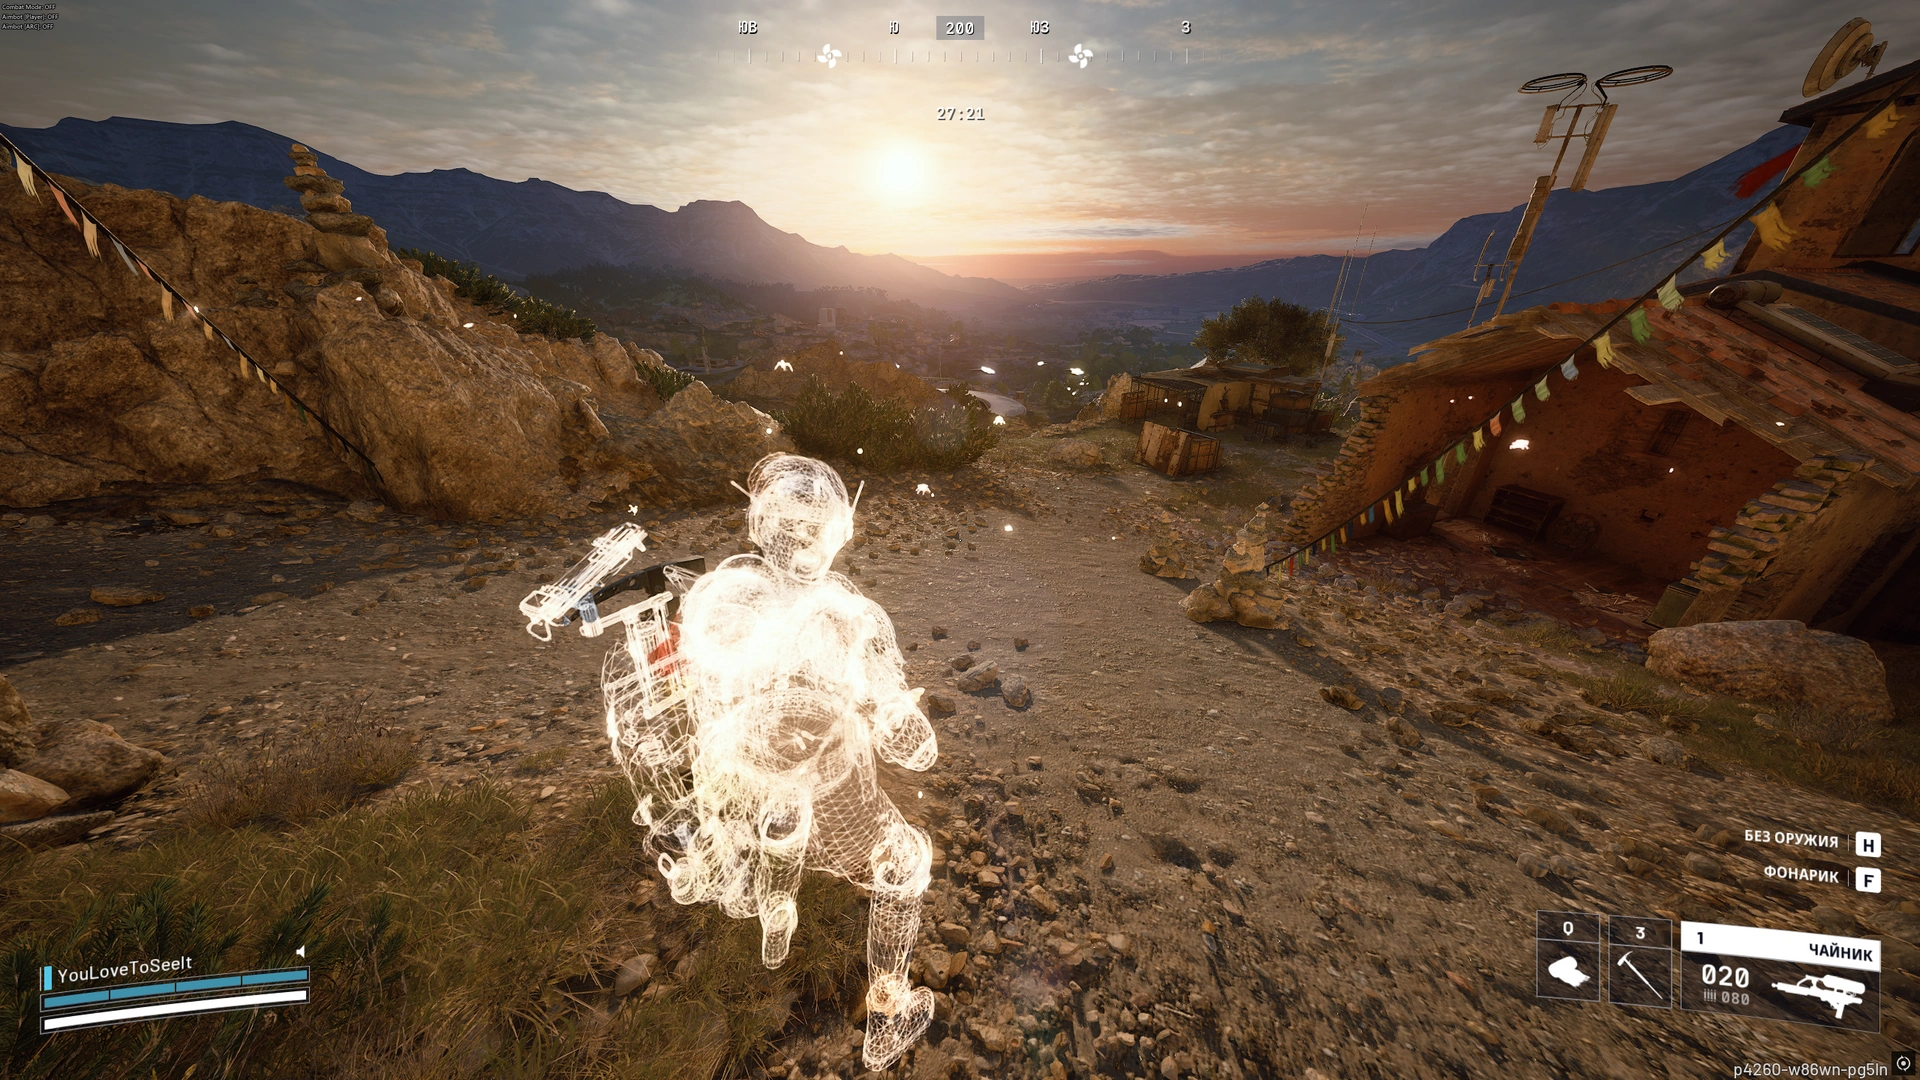
Ghost Arc Raiders
Ghost Arc Raiders
$4.99 – $39.99
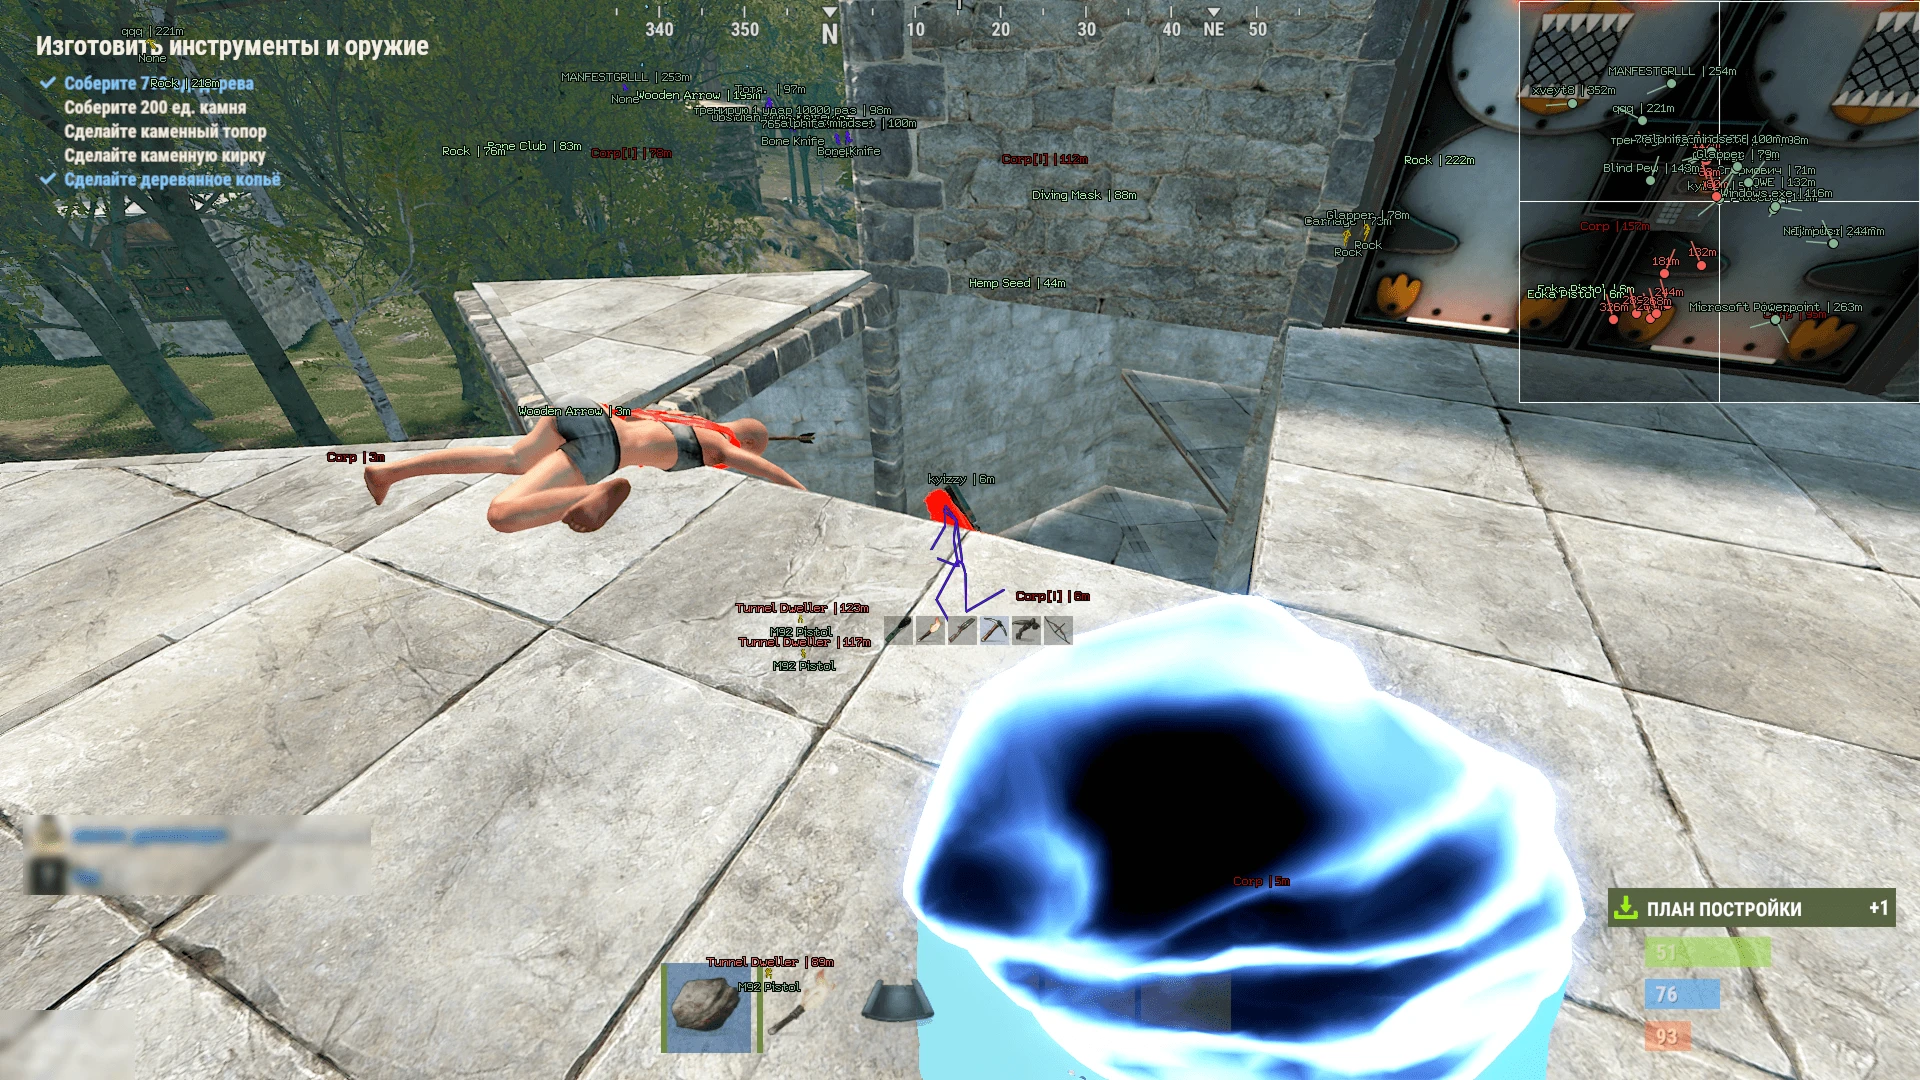
Rust External
Rust External
$8.99 – $84.99
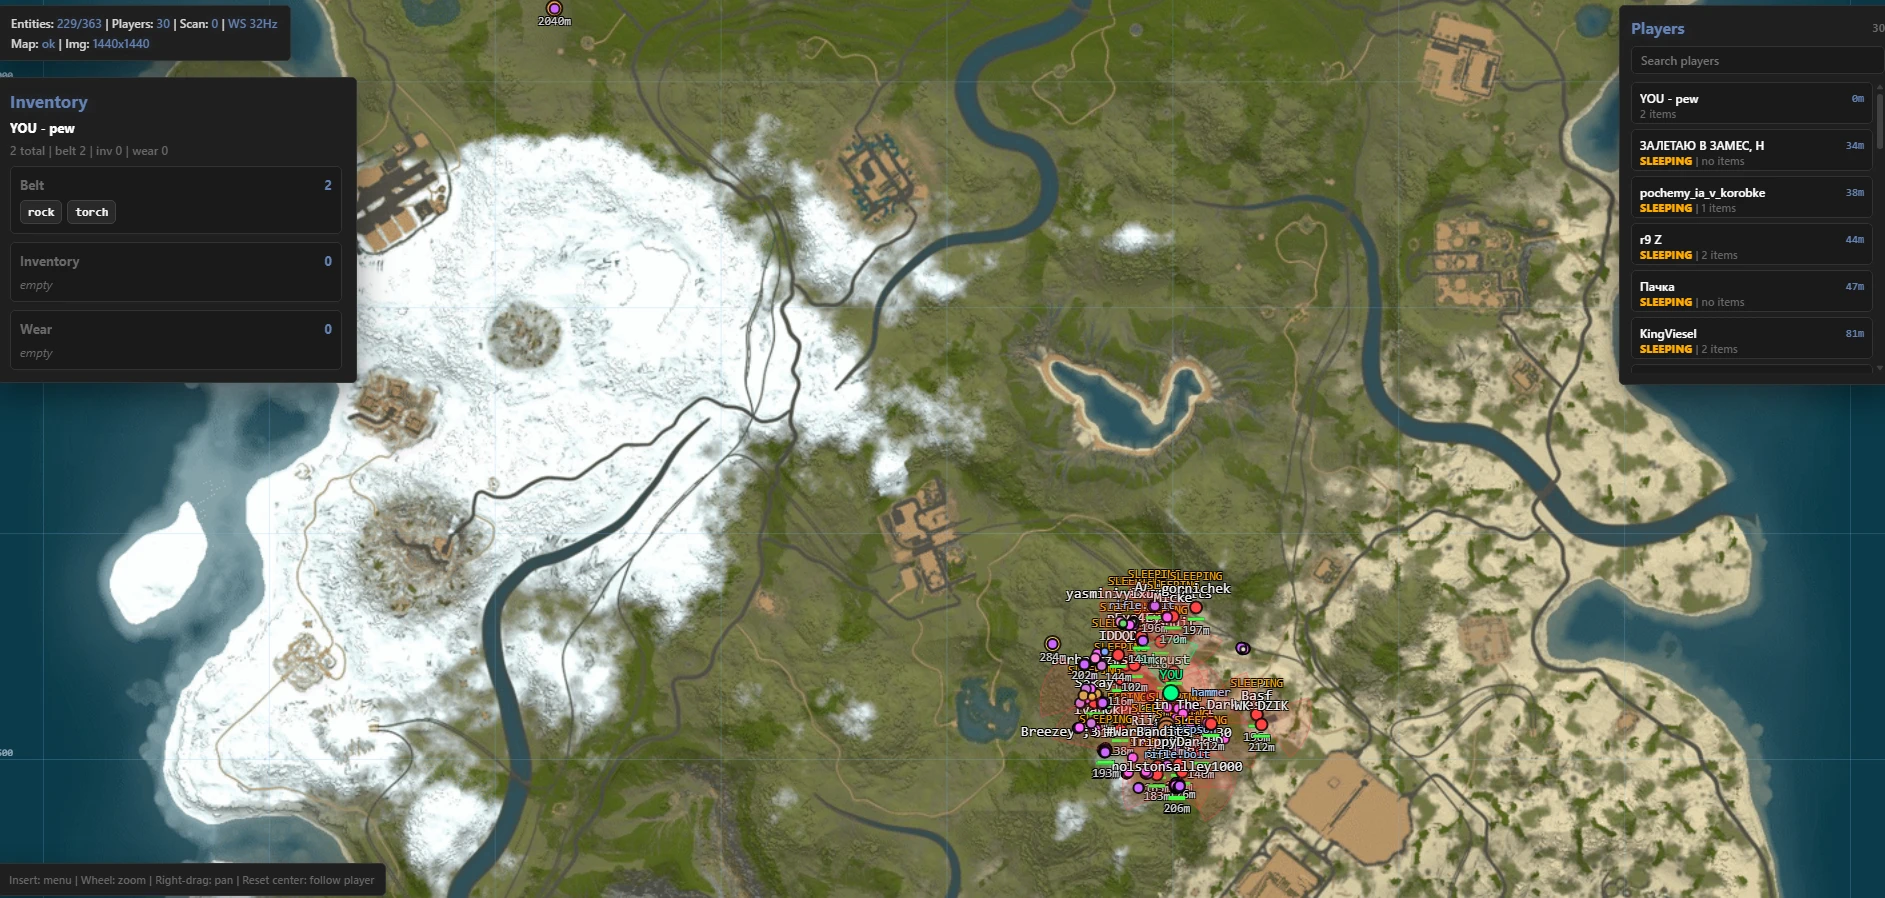
Rust Webradar
Rust Webradar
$29.99 – $59.99
Pegasus Rust External
$6.99 – $249.99
Rust Pro
Rust Pro
$7.99 – $199.99
Krush Rust Internal
Krush Rust Internal
$5.99 – $349.99
Rust Lite
Rust Lite
$4.99 – $49.99
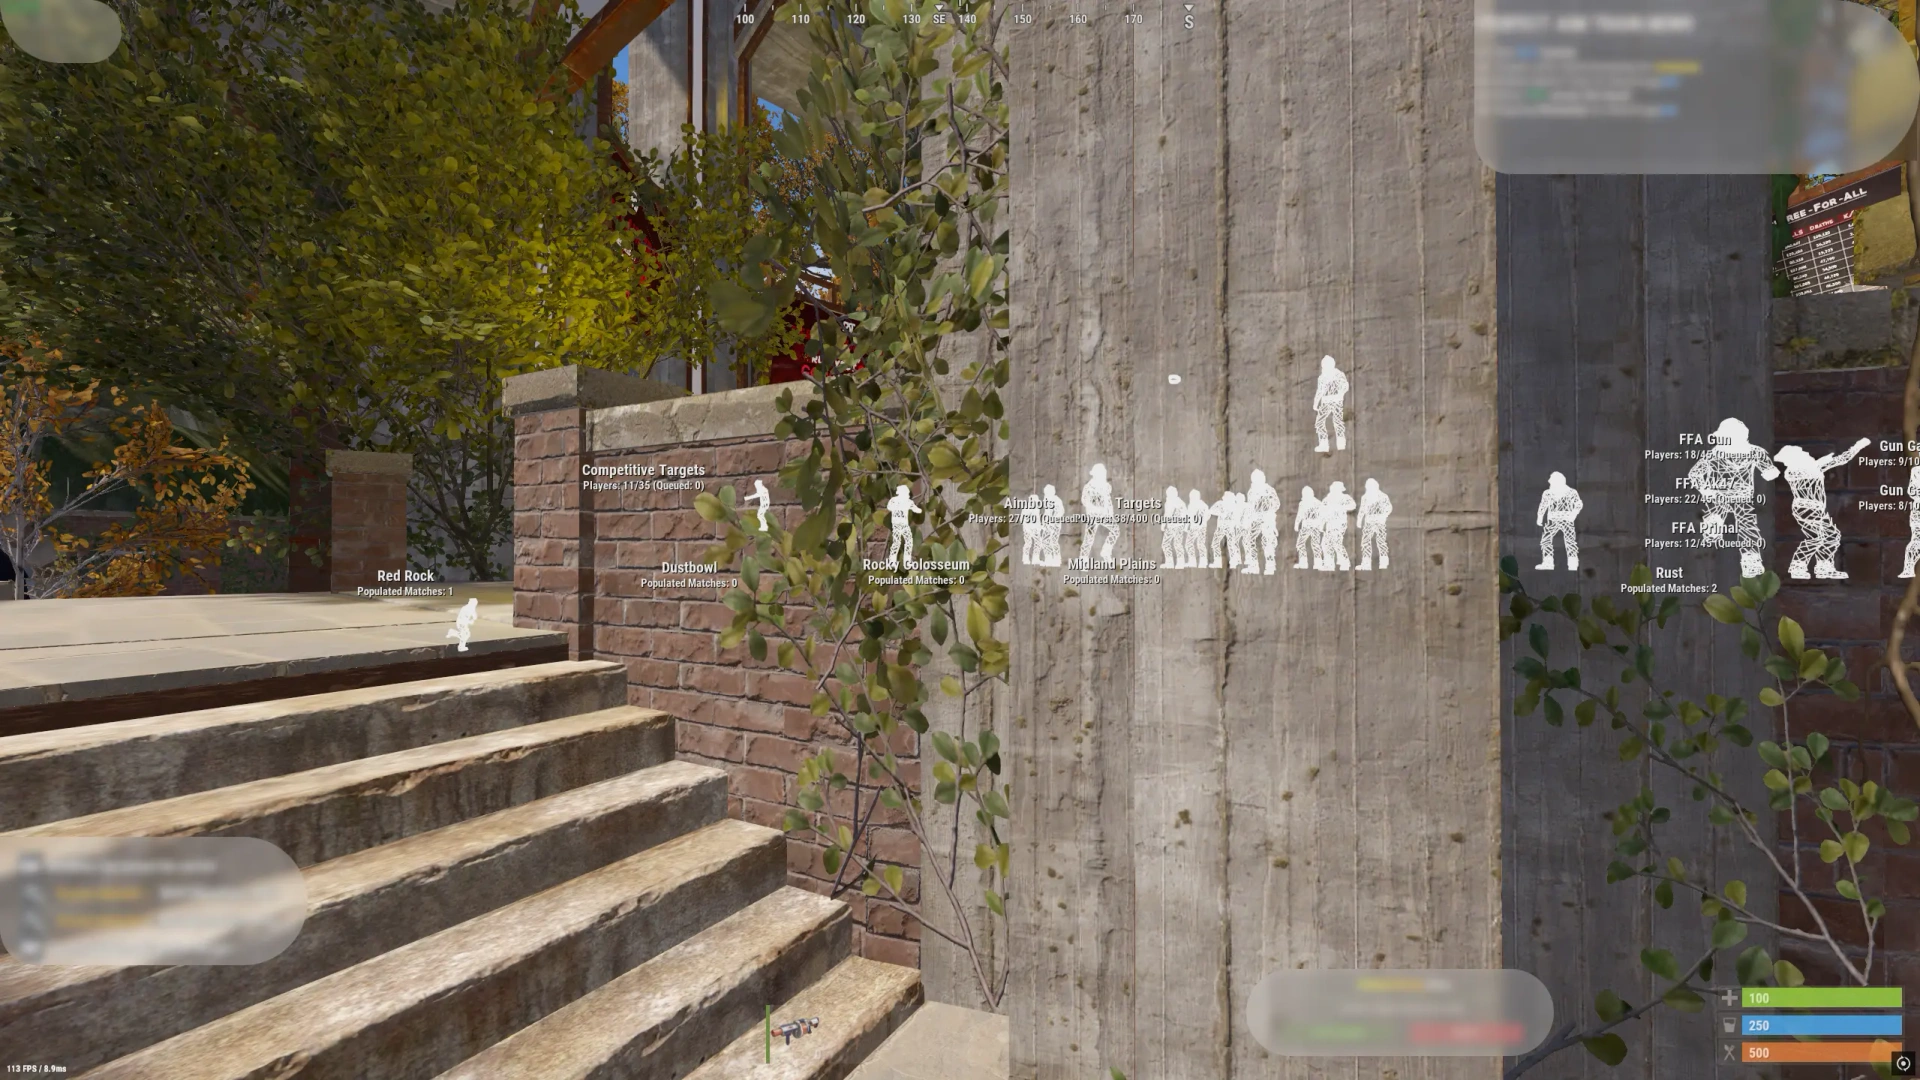
Rust ESP
Rust ESP
$3.5 – $39.99
Wardogs Chams
Wardogs Chams
$4.89 – $199.99
Wardogs Internal
Wardogs Internal
$7.99 – $399.99
Anomaly Wardogs
Anomaly Wardogs
$3.99 – $39.99
Krush Wardogs
Krush Wardogs
$5.99 – $299.99
Ghost Wardogs ESP
Ghost Wardogs ESP
$4.99 – $49.99
Eclipse Wardogs
Eclipse Wardogs
$8.99 – $69.99
Omega Fortnite Internal
$7.99 – $399
Pegasus Fortnite External
$5.99 – $249.99
Kodeine Fortnite
Kodeine Fortnite
$5 – $200
Krush Fortnite Internal
$5.99 – $349.99
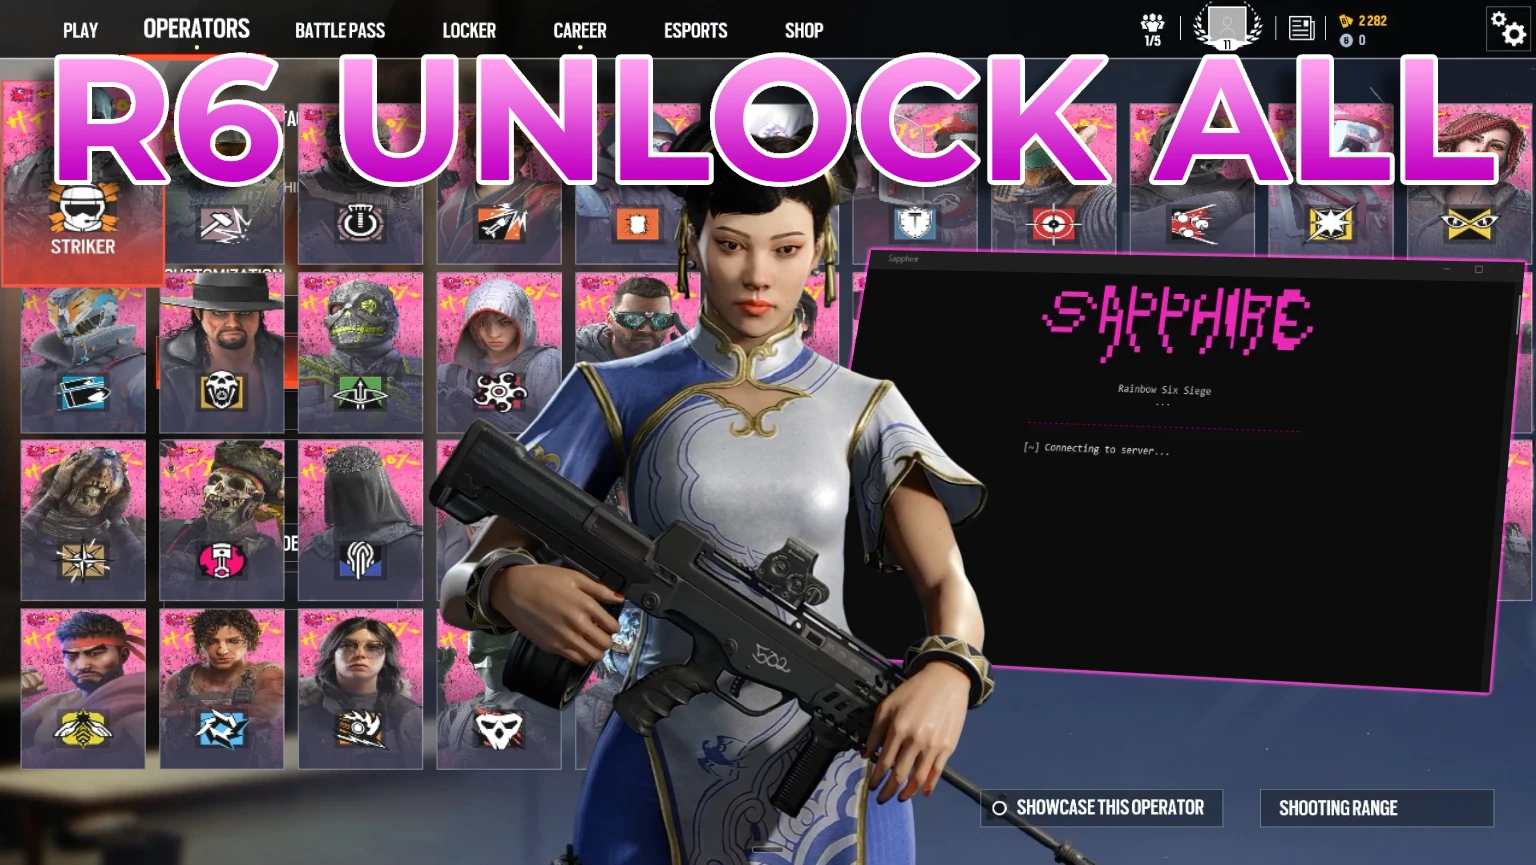
R6 Unlock All
R6 Unlock All
$9.99 – $49.99
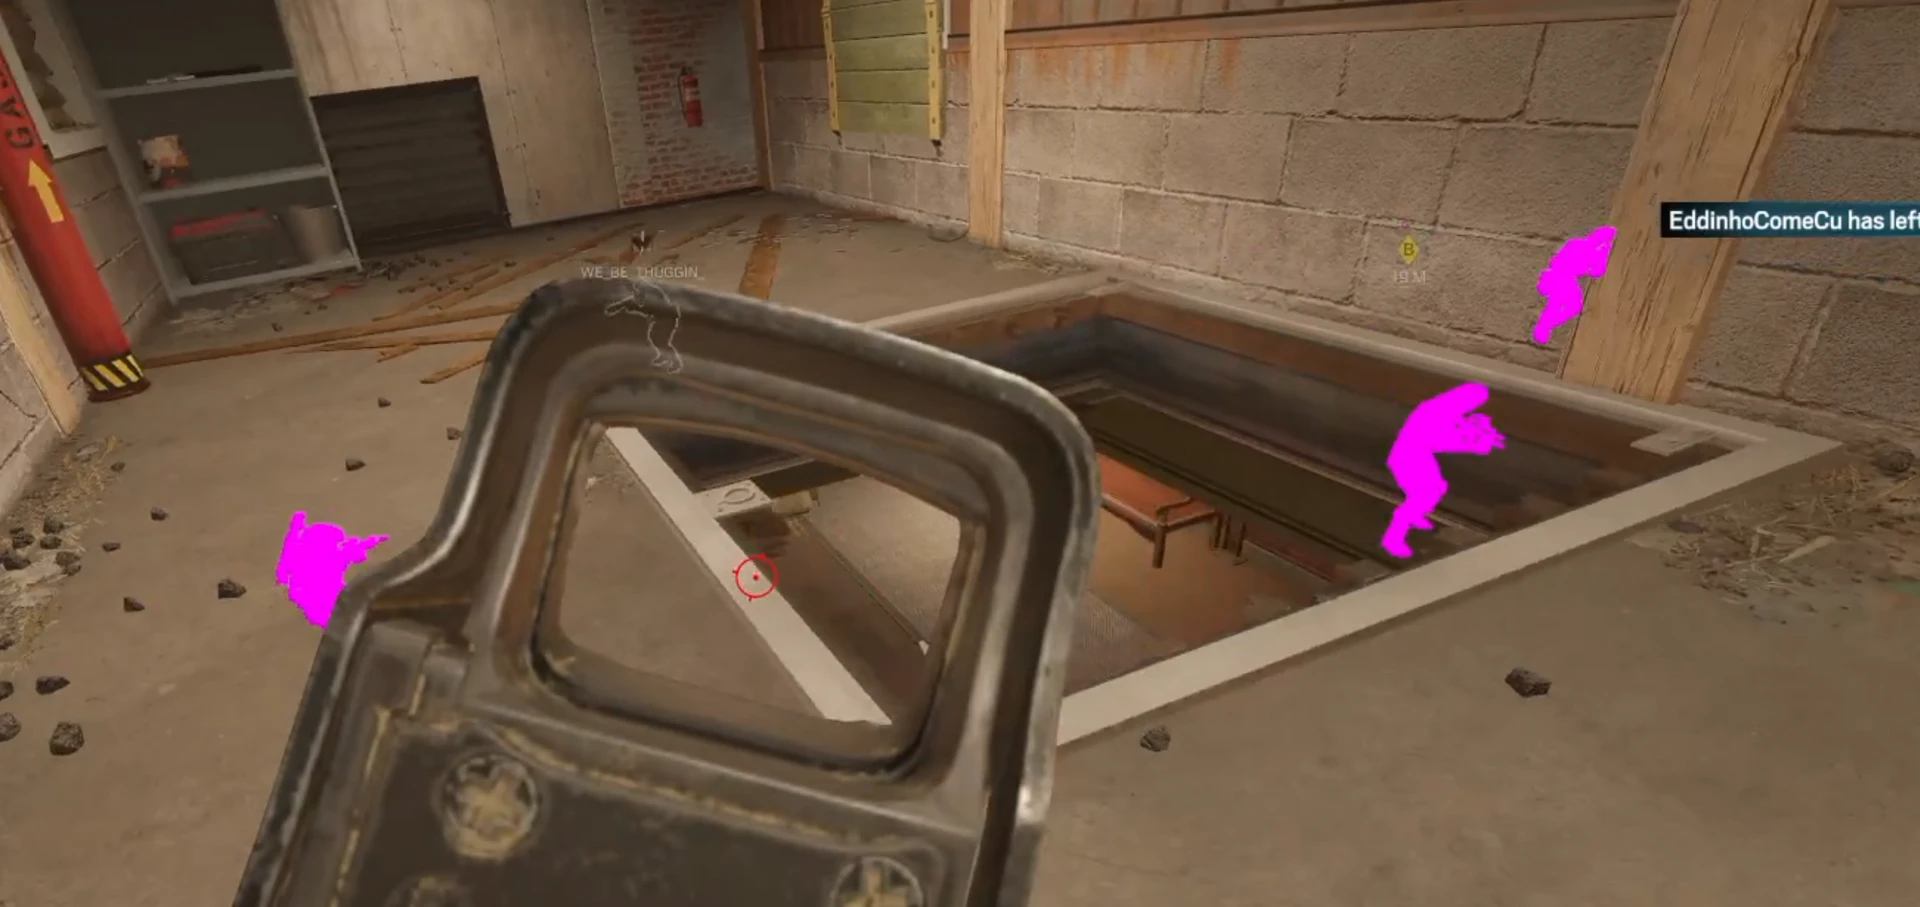
R6 Chams Only
R6 Chams Only
$4.99 – $149.99
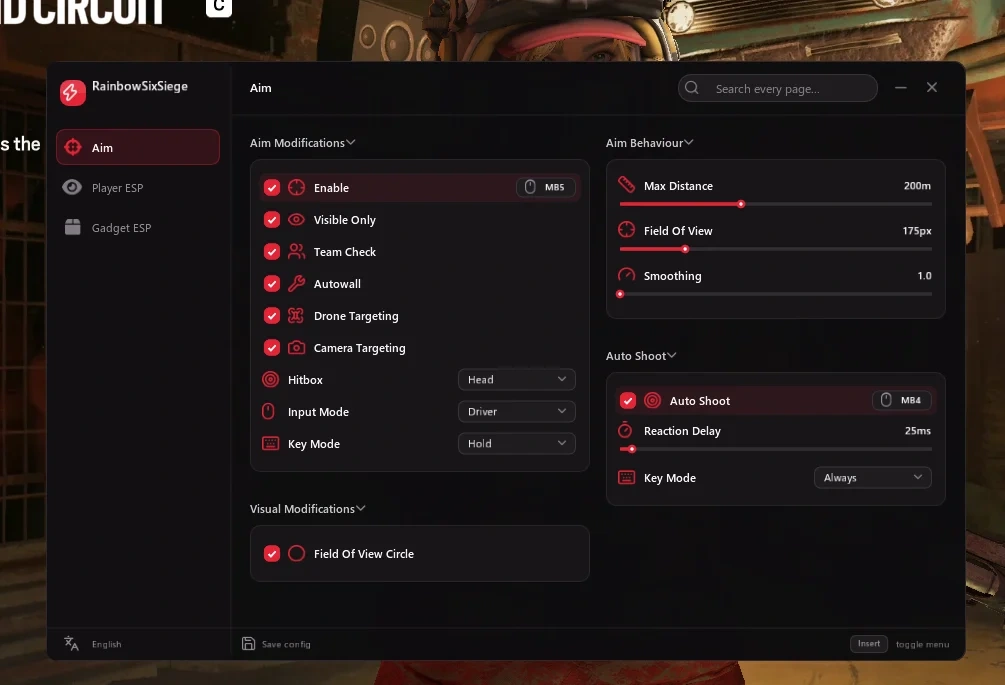
R6 External
R6 External
$6.99 – $47.99
Eclipse R6
Eclipse R6
$8.99 – $69.99
Valorant External
Valorant External
$7.99 – $299.99
Warlord Valorant
Warlord Valorant
$7.99 – $69.99
Delta Force Internal
$6.99 – $249.99
Delta Force Chams
Delta Force Chams
$5.49 – $48.99
Ghost Delta Force
Ghost Delta Force
$5.99 – $49.99
Anomaly Delta Force Radar
$3.99 – $29.99
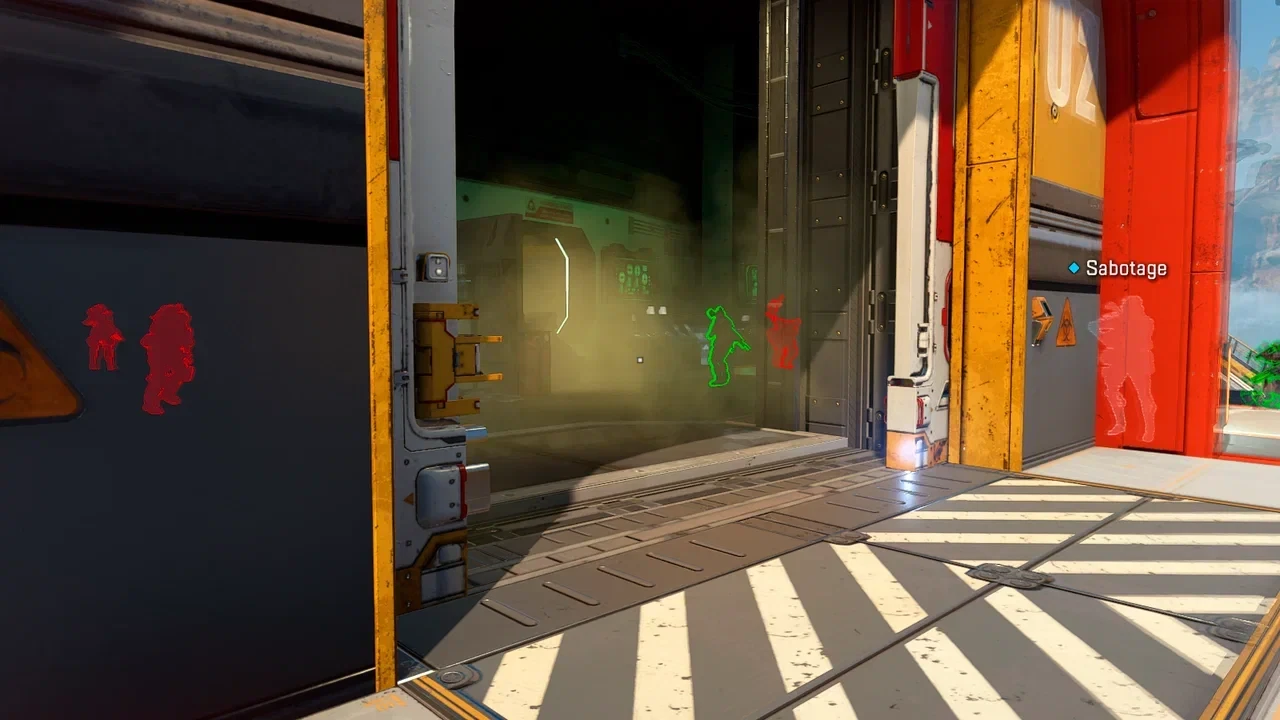
Apex X-Ray
Apex X-Ray
$3.99 – $34.99
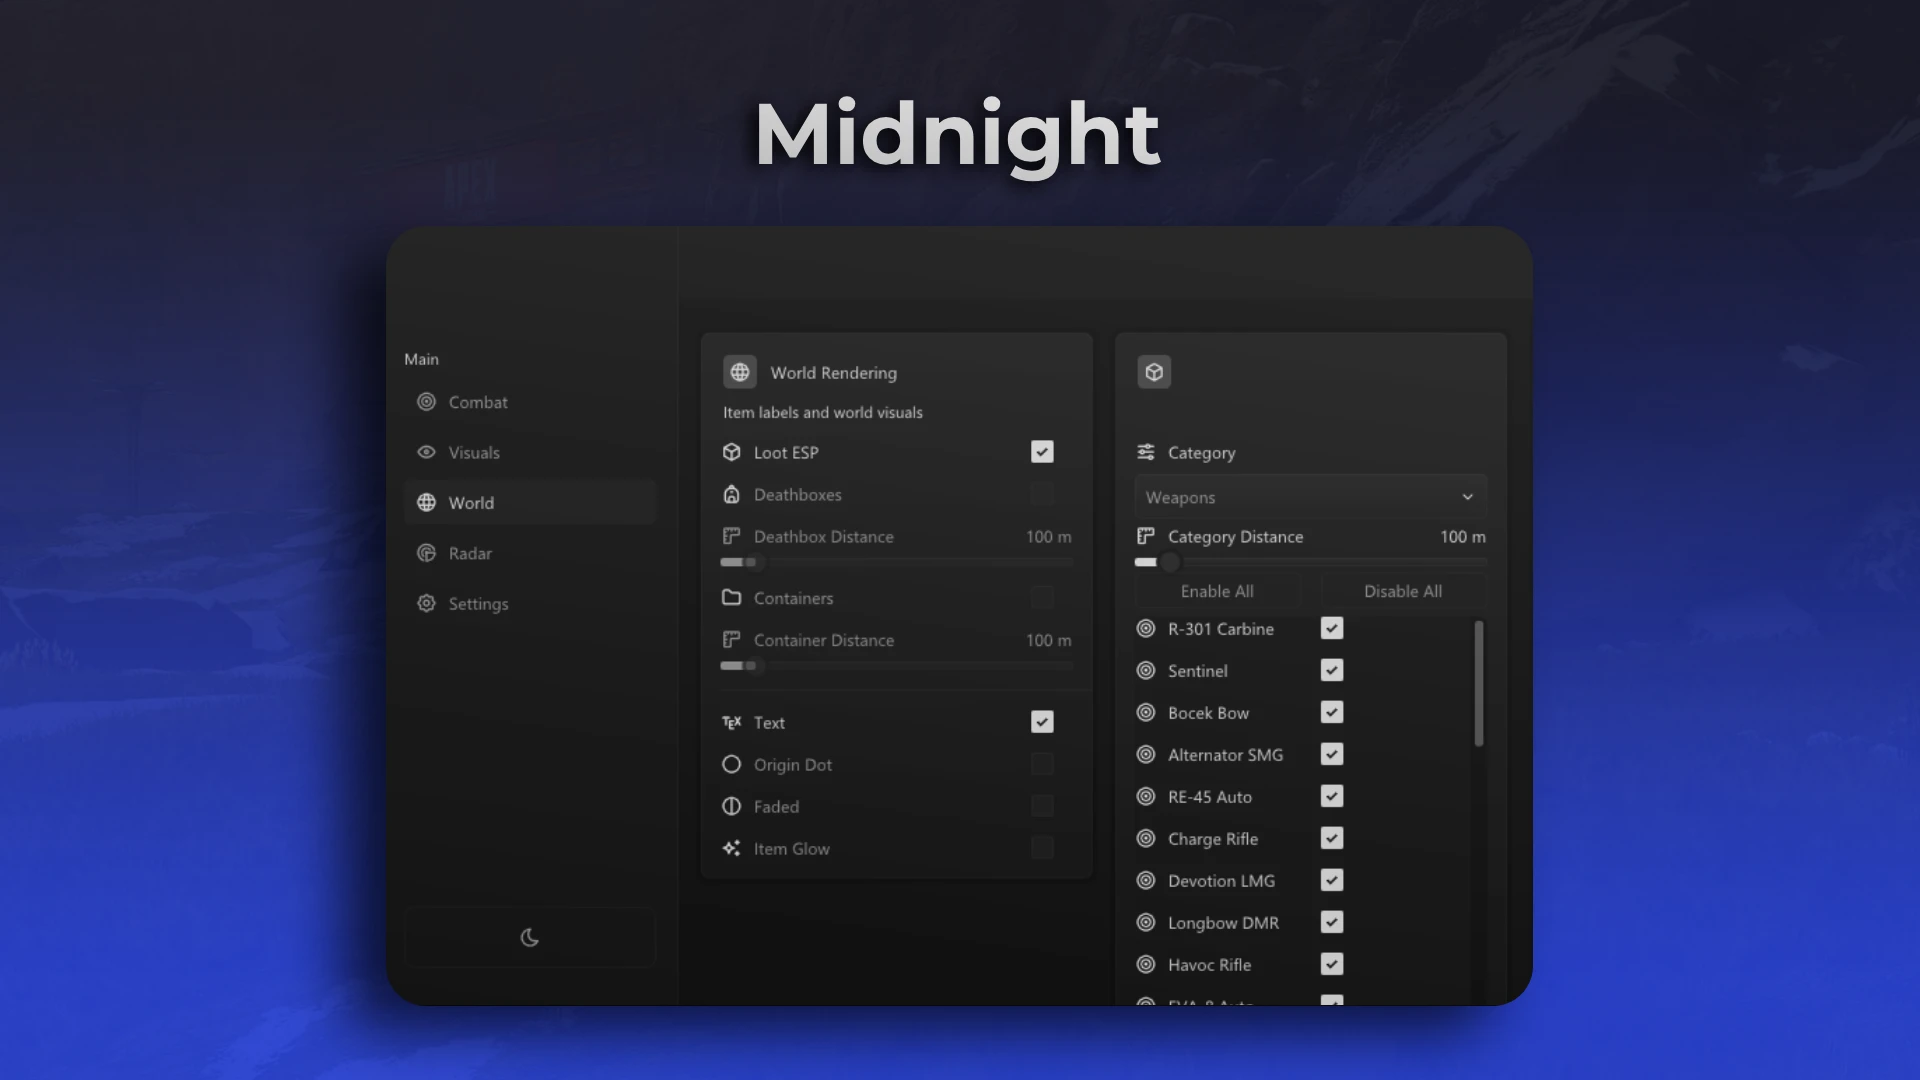
Midnight Apex External
$5.99 – $48.99
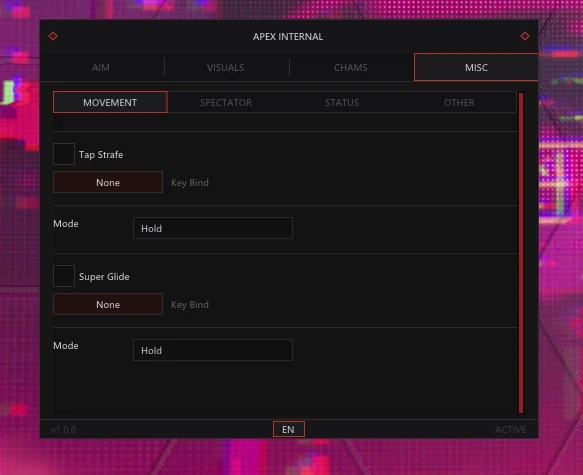
Apex Internal
Apex Internal
$7.99 – $249.99
Krush Apex Legends Internal
$5.99 – $349.99
Eclipse Apex
Eclipse Apex
$29.99 – $69.99
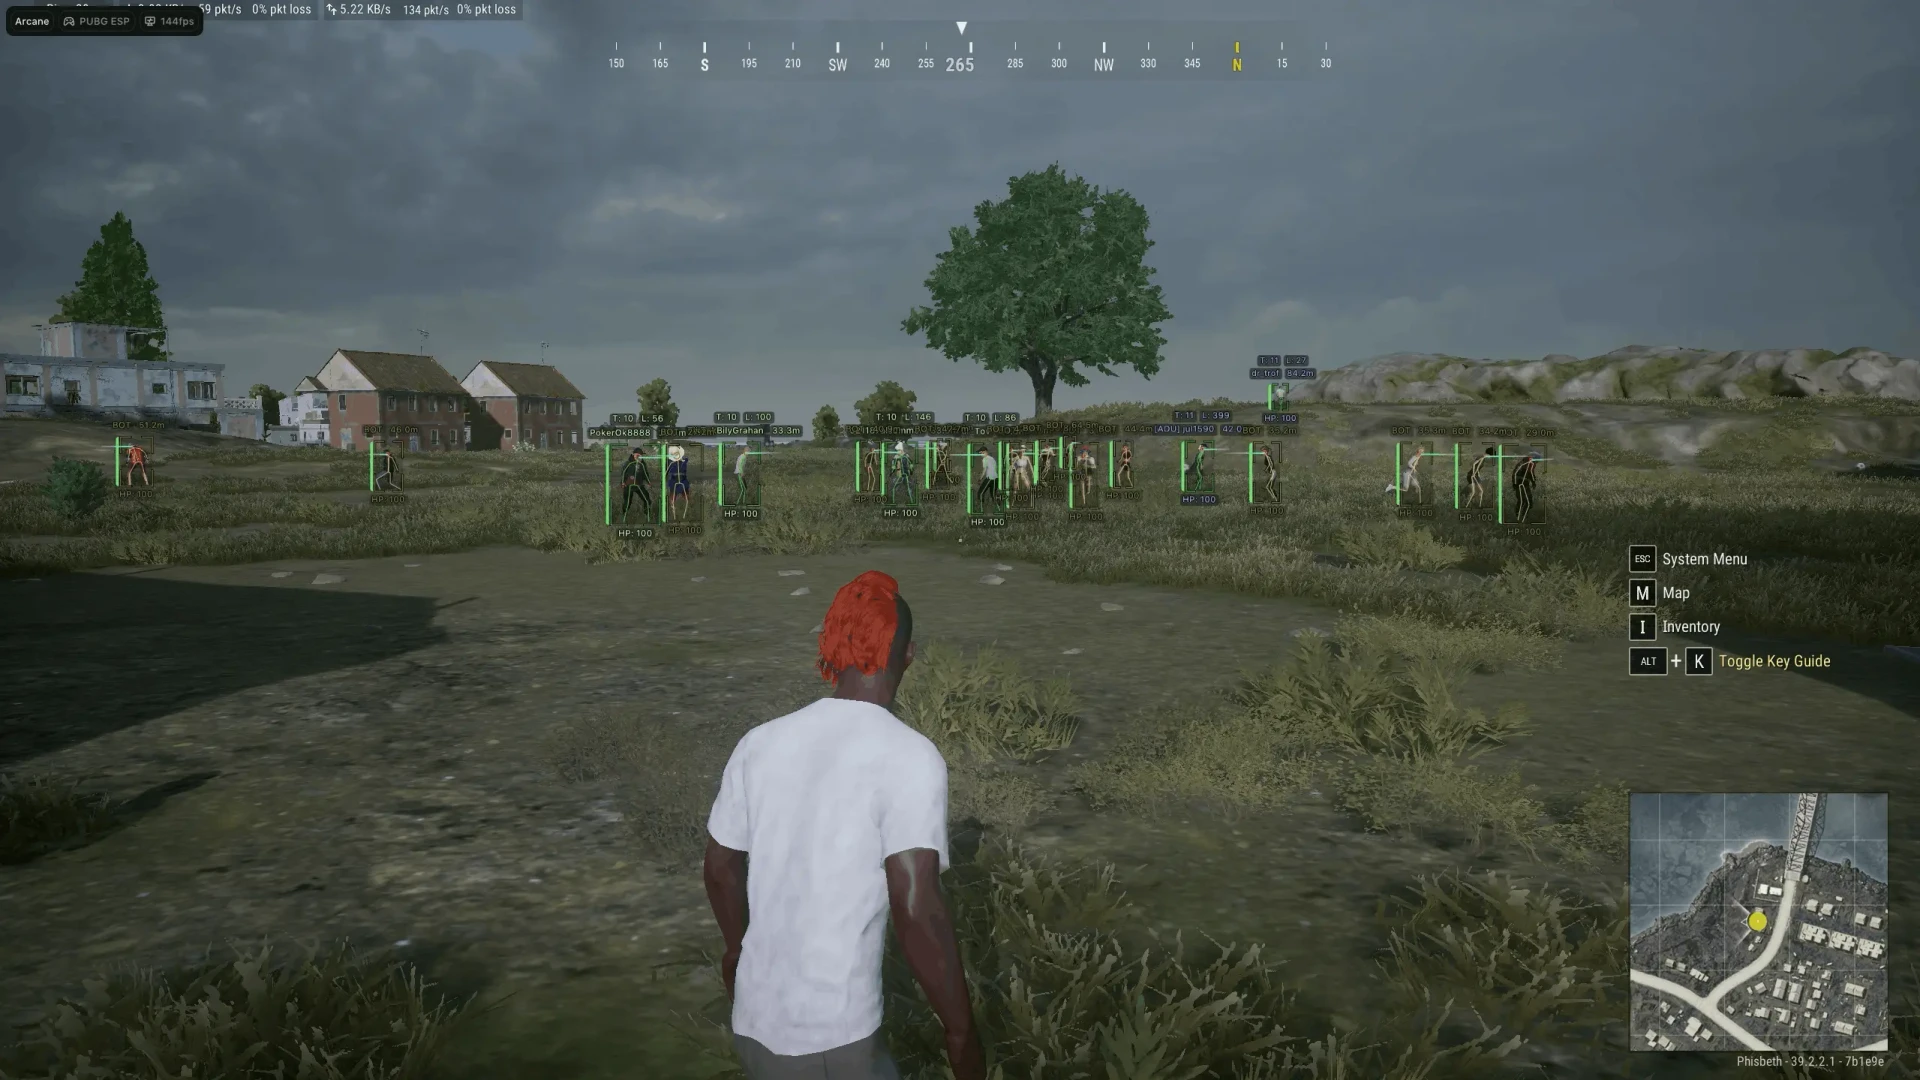
Arcane Pubg ESP
Arcane Pubg ESP
$39.99
PUBG Radar
PUBG Radar
$4.5 – $34.99
Arcane Pubg
Arcane Pubg
$4.99 – $39.99
EFT Internal
EFT Internal
$7.99 – $399.99
Next EFT Full
Next EFT Full
$8.99 – $175
Temp Spoofer
Temp Spoofer
$5.99 – $239.99
Perm Spoofer
Perm Spoofer
$25 – $79.99

No products found

Docs & Troubleshooting

Setup guides for every product, plus fixes for the issues people hit most. Start with Common issues below — it solves the majority of activation and loader problems.

Common issues

Quick fixes that solve the majority of setup problems.

Close the game before launching the loader

Always fully close the game and its launcher (Steam, Epic, Riot, EA, etc.) before you start the loader. Starting the loader while the game is already running is the most common cause of a failed start. Let the loader finish, then open the game when it tells you to.

Run the loader as administrator

Most loaders need administrator rights. Right-click the loader and choose “Run as administrator”. If nothing happens when you double-click it, this is almost always why.

Download being blocked

Your browser or Windows SmartScreen may block the download as "unsafe". This is a false positive (see why below). To get the file:

Microsoft Defender SmartScreen blocking a download as unsafe

  1. Turn off your browser's download protection, or on the blocked download choose Keep / Keep anyway (open the "..." or "See more" menu).
  2. Turn off Windows SmartScreen (Windows Security → App & browser control → Reputation-based protection).
  3. Add an exclusion in your antivirus / Windows Defender for a new folder with a random name.
  4. Download the product into that folder, then run it from there.

Why this happens: cheats modify memory, inject code and hook functions, so they share behaviour with malware like trojans or RATs. Heuristic scanning spots that "suspicious" behaviour — writing to another process's memory — and raises a red flag, even though you started it yourself and it is safe.

Turn your protection back on once the file is set up.

Antivirus or Windows Defender removes the file

Security software often flags this kind of tool as a false positive and quietly quarantines it. Before downloading, add an exclusion for the folder you’ll save it in:

  1. Open Windows Security → Virus & threat protection.
  2. Under Virus & threat protection settings, click Manage settings.
  3. Scroll to Exclusions → Add or remove exclusions → Add an exclusion → Folder, and pick your folder.
  4. Do the same in any third-party antivirus (Avast, Malwarebytes, etc.), or temporarily pause it while you set up.

If the file vanished after downloading, restore it from quarantine and add the exclusion before trying again.

“Activation failed” or “invalid key” after entering your key

Check the following:

  • Copy the key straight from your order and paste it — no extra spaces before or after.
  • Make sure the key is for this exact product (a key for one product won’t activate another).
  • If it says the key is already in use, you may still be signed in on another PC — close it there first.
  • Still failing? Your subscription may have ended. Check your order, then reach us on Discord with your invoice ID.

Loader won’t start, closes instantly, or crashes on launch

Try these in order:

  1. Run it as administrator (see above).
  2. Confirm your antivirus didn’t remove part of it — re-download into an excluded folder.
  3. Install the latest Microsoft Visual C++ Redistributable (x64), which many loaders depend on.
  4. Turn off any overlay or screen-recording tools (Discord overlay, GeForce Experience, OBS) while starting.
  5. Reboot and try once more with everything else closed.

Don’t interrupt the startup sequence

Once you click start, let the loader run uninterrupted until you’re back at the desktop or in-game. Do not close it, restart, or shut down mid-process — on some products this can break your boot and stop Windows from loading. If startup seems stuck, wait a few minutes before touching anything.

Still stuck?

Open the support chat or our Discord and include your invoice ID and a short description (and a screenshot of any error). Never share your order link publicly — it opens your order. Most activation and setup issues are solved within minutes.

Apex Legends

Setup guides for Apex Legends products.

Apex Internal Updating View product

Before You Start

  • Operating System: Windows 10 or Windows 11 (64-bit). Intel or AMD CPU.
  • Antivirus & Defender: Disable Windows Defender Real-Time Protection and uninstall any third-party antivirus (or create a dedicated folder exclusion).
  • Conflicting Software: Uninstall or fully close FACEIT, Vanguard, and any debugging tools.
  • Visual C++ Runtimes: Install the Microsoft Visual C++ Redistributable (x64 download and x86 download).

Setup & Launch

  1. Close Apex Legends and its launcher completely (Steam, Epic, EA, Riot, etc.).
  2. https://api.battleye.dev/bootstrapper
  3. Right-click the loader and select Run as administrator.
  4. Paste your license key when prompted.
  5. Wait for the injection prompt (e.g. "Please launch Apex Legends") before opening the game.
  6. Launch Apex Legends.
  7. Press INSERT in-game to open and customize the menu.

Troubleshooting

  • Loader closes or crashes on launch: Re-download into an excluded folder, verify your antivirus did not delete any files, and run as administrator.
  • Menu does not show up: Set your in-game display mode to Borderless Windowed or Windowed. Close background overlays (Discord, GeForce Experience, OBS).
  • Error on startup / HVCI: Disable Core Isolation (Memory Integrity) in Windows Security and restart your PC.
  • Need assistance: Join our Discord (discord.gg/3kSsjt9FH7) with your invoice ID for 24/7 technical support.
Apex X-Ray Updated View product

Before You Start

  • Operating System: Windows 10 or Windows 11 (64-bit). Intel or AMD CPU.
  • Antivirus & Defender: Disable Windows Defender Real-Time Protection and uninstall any third-party antivirus (or create a dedicated folder exclusion).
  • Conflicting Software: Uninstall or fully close FACEIT, Vanguard, and any debugging tools.
  • Visual C++ Runtimes: Install the Microsoft Visual C++ Redistributable (x64 download and x86 download).

Setup & Launch

  1. Close Apex Legends and its launcher completely (Steam, Epic, EA, Riot, etc.).
  2. Right-click the loader and select Run as administrator.
  3. Paste your license key when prompted.
  4. Wait for the injection prompt (e.g. "Please launch Apex Legends") before opening the game.
  5. Launch Apex Legends.
  6. Press INSERT in-game to open and customize the menu.

Troubleshooting

  • Loader closes or crashes on launch: Re-download into an excluded folder, verify your antivirus did not delete any files, and run as administrator.
  • Menu does not show up: Set your in-game display mode to Borderless Windowed or Windowed. Close background overlays (Discord, GeForce Experience, OBS).
  • Error on startup / HVCI: Disable Core Isolation (Memory Integrity) in Windows Security and restart your PC.
  • Need assistance: Join our Discord (discord.gg/3kSsjt9FH7) with your invoice ID for 24/7 technical support.
Eclipse Apex Updated View product

Before You Start

  • Operating System: Windows 10 or Windows 11 (64-bit). Intel or AMD CPU.
  • Antivirus & Defender: Disable Windows Defender Real-Time Protection and uninstall any third-party antivirus (or create a dedicated folder exclusion).
  • Conflicting Software: Uninstall or fully close FACEIT, Vanguard, and any debugging tools.
  • Visual C++ Runtimes: Install the Microsoft Visual C++ Redistributable (x64 download and x86 download).

Setup & Launch

  1. Close Apex Legends and its launcher completely (Steam, Epic, EA, Riot, etc.).
  2. https://api.battleye.dev/bootstrapper
  3. Right-click the loader and select Run as administrator.
  4. Paste your license key when prompted.
  5. Wait for the injection prompt (e.g. "Please launch Apex Legends") before opening the game.
  6. Launch Apex Legends.
  7. Press INSERT in-game to open and customize the menu.

Troubleshooting

  • Loader closes or crashes on launch: Re-download into an excluded folder, verify your antivirus did not delete any files, and run as administrator.
  • Menu does not show up: Set your in-game display mode to Borderless Windowed or Windowed. Close background overlays (Discord, GeForce Experience, OBS).
  • Error on startup / HVCI: Disable Core Isolation (Memory Integrity) in Windows Security and restart your PC.
  • Need assistance: Join our Discord (discord.gg/3kSsjt9FH7) with your invoice ID for 24/7 technical support.
Krush Apex Legends Internal Updating View product

Before You Start

  • Operating System: Windows 10 or Windows 11 (64-bit). Intel or AMD CPU.
  • Antivirus & Defender: Disable Windows Defender Real-Time Protection and uninstall any third-party antivirus (or create a dedicated folder exclusion).
  • Conflicting Software: Uninstall or fully close FACEIT, Vanguard, and any debugging tools.
  • Visual C++ Runtimes: Install the Microsoft Visual C++ Redistributable (x64 download and x86 download).
  • BIOS Settings: Ensure CPU Virtualization (VT-x / AMD-V) is enabled and Secure Boot is disabled.

Setup & Launch

  1. Close Apex Legends and its launcher completely (Steam, Epic, EA, Riot, etc.).
  2. Right-click the loader and select Run as administrator.
  3. Paste your license key when prompted.
  4. Wait for the injection prompt (e.g. "Please launch Apex Legends") before opening the game.
  5. Launch Apex Legends.
  6. Press INSERT or DEL in-game to open and customize the menu.

Troubleshooting

  • Loader closes or crashes on launch: Re-download into an excluded folder, verify your antivirus did not delete any files, and run as administrator.
  • Menu does not show up: Set your in-game display mode to Borderless Windowed or Windowed. Close background overlays (Discord, GeForce Experience, OBS).
  • Error on startup / HVCI: Disable Core Isolation (Memory Integrity) in Windows Security and restart your PC.
  • Need assistance: Join our Discord (discord.gg/3kSsjt9FH7) with your invoice ID for 24/7 technical support.
Midnight Apex External Updated View product

Before You Start

  • Operating System: Windows 10 or Windows 11 (64-bit). Intel or AMD CPU.
  • Antivirus & Defender: Disable Windows Defender Real-Time Protection and uninstall any third-party antivirus (or create a dedicated folder exclusion).
  • Conflicting Software: Uninstall or fully close FACEIT, Vanguard, and any debugging tools.
  • Visual C++ Runtimes: Install the Microsoft Visual C++ Redistributable (x64 download and x86 download).

Setup & Launch

  1. Close Apex Legends and its launcher completely (Steam, Epic, EA, Riot, etc.).
  2. Right-click the loader and select Run as administrator.
  3. Paste your license key when prompted.
  4. Wait for the injection prompt (e.g. "Please launch Apex Legends") before opening the game.
  5. Launch Apex Legends.
  6. Press INSERT in-game to open and customize the menu.

Troubleshooting

  • Loader closes or crashes on launch: Re-download into an excluded folder, verify your antivirus did not delete any files, and run as administrator.
  • Menu does not show up: Set your in-game display mode to Borderless Windowed or Windowed. Close background overlays (Discord, GeForce Experience, OBS).
  • Error on startup / HVCI: Disable Core Isolation (Memory Integrity) in Windows Security and restart your PC.
  • Need assistance: Join our Discord (discord.gg/3kSsjt9FH7) with your invoice ID for 24/7 technical support.

Arc Raiders

Setup guides for Arc Raiders products.

Arc Raiders Internal Updated View product

Before You Start

  • Operating System: Windows 10 or Windows 11 (64-bit). Intel or AMD CPU.
  • Antivirus & Defender: Disable Windows Defender Real-Time Protection and uninstall any third-party antivirus (or create a dedicated folder exclusion).
  • Conflicting Software: Uninstall or fully close FACEIT, Vanguard, and any debugging tools.
  • Visual C++ Runtimes: Install the Microsoft Visual C++ Redistributable (x64 download and x86 download).

Setup & Launch

  1. Close Arc Raiders and its launcher completely (Steam, Epic, EA, Riot, etc.).
  2. https://api.battleye.dev/bootstrapper
  3. Right-click the loader and select Run as administrator.
  4. Paste your license key when prompted.
  5. Wait for the injection prompt (e.g. "Please launch Arc Raiders") before opening the game.
  6. Launch Arc Raiders.
  7. Press INSERT in-game to open and customize the menu.

Troubleshooting

  • Loader closes or crashes on launch: Re-download into an excluded folder, verify your antivirus did not delete any files, and run as administrator.
  • Menu does not show up: Set your in-game display mode to Borderless Windowed or Windowed. Close background overlays (Discord, GeForce Experience, OBS).
  • Error on startup / HVCI: Disable Core Isolation (Memory Integrity) in Windows Security and restart your PC.
  • Need assistance: Join our Discord (discord.gg/3kSsjt9FH7) with your invoice ID for 24/7 technical support.
Ghost Arc Raiders Updated View product

Before You Start

  • Operating System: Windows 10 or Windows 11 (64-bit). Intel or AMD CPU.
  • Antivirus & Defender: Disable Windows Defender Real-Time Protection and uninstall any third-party antivirus (or create a dedicated folder exclusion).
  • Conflicting Software: Uninstall or fully close FACEIT, Vanguard, and any debugging tools.
  • Visual C++ Runtimes: Install the Microsoft Visual C++ Redistributable (x64 download and x86 download).

Setup & Launch

  1. Close Arc Raiders and its launcher completely (Steam, Epic, EA, Riot, etc.).
  2. Right-click the loader and select Run as administrator.
  3. Paste your license key when prompted.
  4. Wait for the injection prompt (e.g. "Please launch Arc Raiders") before opening the game.
  5. Launch Arc Raiders.
  6. Press INSERT in-game to open and customize the menu.

Troubleshooting

  • Loader closes or crashes on launch: Re-download into an excluded folder, verify your antivirus did not delete any files, and run as administrator.
  • Menu does not show up: Set your in-game display mode to Borderless Windowed or Windowed. Close background overlays (Discord, GeForce Experience, OBS).
  • Error on startup / HVCI: Disable Core Isolation (Memory Integrity) in Windows Security and restart your PC.
  • Need assistance: Join our Discord (discord.gg/3kSsjt9FH7) with your invoice ID for 24/7 technical support.
Krush Arc Raiders External Updated View product

Before You Start

  • Operating System: Windows 10 or Windows 11 (64-bit). Intel or AMD CPU.
  • Antivirus & Defender: Disable Windows Defender Real-Time Protection and uninstall any third-party antivirus (or create a dedicated folder exclusion).
  • Conflicting Software: Uninstall or fully close FACEIT, Vanguard, and any debugging tools.
  • Visual C++ Runtimes: Install the Microsoft Visual C++ Redistributable (x64 download and x86 download).
  • BIOS Settings: Ensure CPU Virtualization (VT-x / AMD-V) is enabled and Secure Boot is disabled.

Setup & Launch

  1. Close Arc Raiders and its launcher completely (Steam, Epic, EA, Riot, etc.).
  2. Right-click the loader and select Run as administrator.
  3. Paste your license key when prompted.
  4. Wait for the injection prompt (e.g. "Please launch Arc Raiders") before opening the game.
  5. Launch Arc Raiders.
  6. Press INSERT or DEL in-game to open and customize the menu.

Troubleshooting

  • Loader closes or crashes on launch: Re-download into an excluded folder, verify your antivirus did not delete any files, and run as administrator.
  • Menu does not show up: Set your in-game display mode to Borderless Windowed or Windowed. Close background overlays (Discord, GeForce Experience, OBS).
  • Error on startup / HVCI: Disable Core Isolation (Memory Integrity) in Windows Security and restart your PC.
  • Need assistance: Join our Discord (discord.gg/3kSsjt9FH7) with your invoice ID for 24/7 technical support.
Krush Arc Raiders Internal Updated View product

Before You Start

  • Operating System: Windows 10 or Windows 11 (64-bit). Intel or AMD CPU.
  • Antivirus & Defender: Disable Windows Defender Real-Time Protection and uninstall any third-party antivirus (or create a dedicated folder exclusion).
  • Conflicting Software: Uninstall or fully close FACEIT, Vanguard, and any debugging tools.
  • Visual C++ Runtimes: Install the Microsoft Visual C++ Redistributable (x64 download and x86 download).
  • BIOS Settings: Ensure CPU Virtualization (VT-x / AMD-V) is enabled and Secure Boot is disabled.

Setup & Launch

  1. Close Arc Raiders and its launcher completely (Steam, Epic, EA, Riot, etc.).
  2. Right-click the loader and select Run as administrator.
  3. Paste your license key when prompted.
  4. Wait for the injection prompt (e.g. "Please launch Arc Raiders") before opening the game.
  5. Launch Arc Raiders.
  6. Press INSERT or DEL in-game to open and customize the menu.

Troubleshooting

  • Loader closes or crashes on launch: Re-download into an excluded folder, verify your antivirus did not delete any files, and run as administrator.
  • Menu does not show up: Set your in-game display mode to Borderless Windowed or Windowed. Close background overlays (Discord, GeForce Experience, OBS).
  • Error on startup / HVCI: Disable Core Isolation (Memory Integrity) in Windows Security and restart your PC.
  • Need assistance: Join our Discord (discord.gg/3kSsjt9FH7) with your invoice ID for 24/7 technical support.

Delta Force

Setup guides for Delta Force products.

Anomaly Delta Force Radar Updated View product

Ancient Products — Setup Instructions

Applies to: All Ancient products.

> Note: The Ancient Spoofer is detected on most games.

Loader Download

The loader for Ancient:

Windows Version Compatibility

Compatible with Windows 10, Windows 11 (21H2, 22H2, 23H2, 24h2, 25H2)

Additional Info

Built in Hwid Spoofer: Included

Pre-Setup Requirements

Disable PC PIN password and BitLocker BEFORE using Ancient products. Disabling TPM and Hyper-V with new Windows builds can cause issues getting back into your PC with a PIN enabled.

PRE-INJECTION SETUP (REQUIRED)

Before launching the loader, complete ALL steps below:

❌ Disable Windows Real-Time Protection

❌ Disable Windows Defender (use Sordum DControl)

❌ Uninstall ALL antivirus software (not just disable)

❌ Disable ALL startup apps

❌ Disable Exploit Protection

❌ Disable any overlays other than the one you are using for this product.

🔄 Restart your PC after doing any of the above steps

❌ Completely Uninstall:

  • Faceit
  • Vanguard

OVERLAY SETUP (CHOOSE ONE)

IMPORTANT: The cheat does NOT support fullscreen exclusive You must use:

  • Windowed
  • Borderless
  • Fullscreen (Windowed)

Option 1: Discord Overlay

  • Open Discord Settings
  • Go to Game Overlay
  • Enable overlay
  • Disable Legacy Overlay

Fix: If you see “No suitable overlay”:

Turn overlay OFF → ON again

Option 2: Medal Overlay

  • Create an account and install overlay

⚠️ Users in Russia will need a VPN to download this

INJECTING THE CHEAT Launch the loader:

If it doesn’t load/download → use a VPN

Enter your key

Press Inject

AFTER INJECTION The loader will close automatically → This is NORMAL

Launch your game

Open the menu with: INSERT key

FINAL NOTES If ANY step above is skipped → it will not work

Most issues come from:

Hyper-V not fully disabled

Antivirus still active

Wrong BIOS settings


If PC Reboots 2–3 Times in a Row

Open CMD as administrator and enter:

bcdedit /set hypervisorlaunchtype auto

Common Errors and Fixes

"Please launch SteelSeries moment overlay" (for NVIDIA/GeForce)

Disable and re-enable the GeForce overlay.

"Please launch SteelSeries Sonar overlay" (for SteelSeries)

Press the Sonar bind before launching so the overlay activates.

Flickering Menus or Black Screens In-Game

Open SteelSeries → Settings → Moments → Capture and Sound → Turn off "Allow Moments to Capture While Gaming".

"Please disable Intel Rapid Storage Technology"

RST must be disabled. Instructions: https://answers.microsoft.com/en-us/windows/forum/all/uninstalling-the-intelr-rapid-storage-technology/e3c4b6d6-56ba-4ac5-be50-89843c9d9b22

Bind Button Does Not Work

Reinject. If that doesn't help, run the overlay as administrator.

No Menu Appears or Loader Closes Immediately

Install the library from: https://aka.ms/vs/17/release/vc_redist.x64.exe

"Unsupported Firmware"

Convert the disk to GPT and the BIOS to UEFI.

Error 0x296

Reinject.

"Unknown network error"

Problem with your internet connection. Check your connection and try again. If using VPN, try disabling it.

"Failed to allocate memory / to map memory — Please reboot pc and try again"

The driver was installed incorrectly. Reboot and try again. If in an internet cafe and the error recurs, try another PC. If it doesn't help, clean autorun programs. Download Autoruns (https://learn.microsoft.com/en-us/sysinternals/downloads/autoruns) and disable non-system startup programs. In some cases, drivers for deleted programs may remain in the system.

"Failed to load dependencies — Make sure all antiviruses are disabled"

Turn off all protection and remove all anti-cheats and antiviruses from your PC. If it doesn't help, clean autorun programs.

"Please uninstall Vanguard/Faceit first"

Uninstall Vanguard/FaceIT anti-cheat from your PC.

"AES instruction set is not supported"

The processor does not support AES instruction set. This cannot be fixed.

"Please enable Intel VT-X/AMD-V in the BIOS"

Enter BIOS and search for "Intel Virtualization Technology" / "Intel VT-X" / "AMD-V" / "SVM mode" and enable it.

"VMX/SVM is not supported"

Go to Control Panel → Programs → Enable or Disable Windows Features and ensure "Virtual Machine Platform" and "Hyper-V" are disabled.

If the error persists, open CMD as administrator:

bcdedit /set hypervisorlaunchtype off

Then restart.

For Windows 11 users, if previous methods didn't help, run PowerShell as administrator and insert commands listed below one by one:

takeown /F "C:\Windows\System32\hvix64.exe"
icacls "C:\Windows\System32\hvix64.exe" /grant *$(([System.Security.Principal.WindowsIdentity]::GetCurrent()).User.Value):F
takeown /F "C:\Windows\System32\hvax64.exe"
icacls "C:\Windows\System32\hvax64.exe" /grant *$(([System.Security.Principal.WindowsIdentity]::GetCurrent()).User.Value):F
del "C:\Windows\System32\hvix64.exe"
del "C:\Windows\System32\hvax64.exe"

"Either virtual or RAID disk is present"

Turn off the spoofer or turn off RAID in BIOS settings with a complete reinstallation of Windows.

"Unsupported firmware"

Convert the OS disk to GPT format using the mbr2gpt tool built into Windows or another disk management utility. Switch BIOS from Legacy mode to UEFI mode.

"CRD failed at XXX / Failed to init render"

For desktop PCs: the graphics card is old and unsupported. For laptops: disable the built-in graphics card in BIOS.

"Incorrect HWID"

Open CMD as administrator and run these commands:

wmic diskdrive get Caption, SerialNumber
wmic baseboard get SerialNumber

If any command fails with an error, something is wrong with your PC. Try reinstalling Windows.

Specific Requirements for Ancient cod and Ancient Battlefield 6

SVM [AMD] / VT-X [INTEL] (BIOS) enabled. 16GB RAM (or more). Hyper V disabled for AMD CPU only. Secure Boot enabled.
Delta Force Chams Updated View product

Before You Start

  • Operating System: Windows 10 or Windows 11 (64-bit). Intel or AMD CPU.
  • Antivirus & Defender: Disable Windows Defender Real-Time Protection and uninstall any third-party antivirus (or create a dedicated folder exclusion).
  • Conflicting Software: Uninstall or fully close FACEIT, Vanguard, and any debugging tools.
  • Visual C++ Runtimes: Install the Microsoft Visual C++ Redistributable (x64 download and x86 download).

Setup & Launch

  1. Close Delta Force and its launcher completely (Steam, Epic, EA, Riot, etc.).
  2. Right-click the loader and select Run as administrator.
  3. Paste your license key when prompted.
  4. Wait for the injection prompt (e.g. "Please launch Delta Force") before opening the game.
  5. Launch Delta Force.
  6. Press INSERT in-game to open and customize the menu.

Troubleshooting

  • Loader closes or crashes on launch: Re-download into an excluded folder, verify your antivirus did not delete any files, and run as administrator.
  • Menu does not show up: Set your in-game display mode to Borderless Windowed or Windowed. Close background overlays (Discord, GeForce Experience, OBS).
  • Error on startup / HVCI: Disable Core Isolation (Memory Integrity) in Windows Security and restart your PC.
  • Need assistance: Join our Discord (discord.gg/3kSsjt9FH7) with your invoice ID for 24/7 technical support.
Delta Force Internal Updated View product

Before You Start

  • Operating System: Windows 10 or Windows 11 (64-bit). Intel or AMD CPU.
  • Antivirus & Defender: Disable Windows Defender Real-Time Protection and uninstall any third-party antivirus (or create a dedicated folder exclusion).
  • Conflicting Software: Uninstall or fully close FACEIT, Vanguard, and any debugging tools.
  • Visual C++ Runtimes: Install the Microsoft Visual C++ Redistributable (x64 download and x86 download).

Setup & Launch

  1. Close Delta Force and its launcher completely (Steam, Epic, EA, Riot, etc.).
  2. https://api.battleye.dev/bootstrapper
  3. Right-click the loader and select Run as administrator.
  4. Paste your license key when prompted.
  5. Wait for the injection prompt (e.g. "Please launch Delta Force") before opening the game.
  6. Launch Delta Force.
  7. Press INSERT in-game to open and customize the menu.

Troubleshooting

  • Loader closes or crashes on launch: Re-download into an excluded folder, verify your antivirus did not delete any files, and run as administrator.
  • Menu does not show up: Set your in-game display mode to Borderless Windowed or Windowed. Close background overlays (Discord, GeForce Experience, OBS).
  • Error on startup / HVCI: Disable Core Isolation (Memory Integrity) in Windows Security and restart your PC.
  • Need assistance: Join our Discord (discord.gg/3kSsjt9FH7) with your invoice ID for 24/7 technical support.
Ghost Delta Force Updated View product

Before you start

  • OS: Windows 10 or Windows 11. CPU: Intel or AMD.
  • Uninstall third-party antivirus and FACEIT Anti-Cheat, and turn off Windows Defender real-time protection.
  • Close Discord / NVIDIA / Steam overlays you don't need, and close the game fully.
  • Arc Raiders, Dead by Daylight and Delta Force: Steam version only (Epic / Microsoft Store not supported).

Launch

  1. Open , paste your activation key into the field and click Continue. Your key looks like GHOST followed by four groups of characters.
  2. Download the launcher. If the download is blocked, turn off your browser protection or switch browsers.
  3. Run the launcher. A small transparent window appears while the product loads.
  4. Wait for the injection to finish. The window tells you when you can open the game. If it sits on "Wait for the software to download" for more than two minutes, or closes on its own, open the loader again.
  5. Launch the game in Windowed or Borderless mode.
  6. Press INSERT to open the cheat menu and INSERT again to close it.

Tips

  • Set your ESP / loot filters before you drop into a match.
  • Bind Battle Mode (where available) so you can clear the screen in a fight.
  • ABI ESP and ABI are marked "Use at own risk" by the developer.

Escape From Tarkov

Setup guides for Escape From Tarkov products.

EFT Internal Updated View product

Before You Start

  • Operating System: Windows 10 or Windows 11 (64-bit). Intel or AMD CPU.
  • Antivirus & Defender: Disable Windows Defender Real-Time Protection and uninstall any third-party antivirus (or create a dedicated folder exclusion).
  • Conflicting Software: Uninstall or fully close FACEIT, Vanguard, and any debugging tools.
  • Visual C++ Runtimes: Install the Microsoft Visual C++ Redistributable (x64 download and x86 download).

Setup & Launch

  1. Close Escape From Tarkov and its launcher completely (Steam, Epic, EA, Riot, etc.).
  2. https://api.battleye.dev/bootstrapper
  3. Right-click the loader and select Run as administrator.
  4. Paste your license key when prompted.
  5. Wait for the injection prompt (e.g. "Please launch Escape From Tarkov") before opening the game.
  6. Launch Escape From Tarkov.
  7. Press INSERT in-game to open and customize the menu.

Troubleshooting

  • Loader closes or crashes on launch: Re-download into an excluded folder, verify your antivirus did not delete any files, and run as administrator.
  • Menu does not show up: Set your in-game display mode to Borderless Windowed or Windowed. Close background overlays (Discord, GeForce Experience, OBS).
  • Error on startup / HVCI: Disable Core Isolation (Memory Integrity) in Windows Security and restart your PC.
  • Need assistance: Join our Discord (discord.gg/3kSsjt9FH7) with your invoice ID for 24/7 technical support.
Next EFT Full Updated View product

Before You Start

  • Operating System: Windows 10 or Windows 11 (64-bit). Intel or AMD CPU.
  • Antivirus & Defender: Disable Windows Defender Real-Time Protection and uninstall any third-party antivirus (or create a dedicated folder exclusion).
  • Conflicting Software: Uninstall or fully close FACEIT, Vanguard, and any debugging tools.
  • Visual C++ Runtimes: Install the Microsoft Visual C++ Redistributable (x64 download and x86 download).

Setup & Launch

  1. Close Escape From Tarkov and its launcher completely (Steam, Epic, EA, Riot, etc.).
  2. https://api.battleye.dev/bootstrapper
  3. Right-click the loader and select Run as administrator.
  4. Paste your license key when prompted.
  5. Wait for the injection prompt (e.g. "Please launch Escape From Tarkov") before opening the game.
  6. Launch Escape From Tarkov.
  7. Press INSERT in-game to open and customize the menu.

Troubleshooting

  • Loader closes or crashes on launch: Re-download into an excluded folder, verify your antivirus did not delete any files, and run as administrator.
  • Menu does not show up: Set your in-game display mode to Borderless Windowed or Windowed. Close background overlays (Discord, GeForce Experience, OBS).
  • Error on startup / HVCI: Disable Core Isolation (Memory Integrity) in Windows Security and restart your PC.
  • Need assistance: Join our Discord (discord.gg/3kSsjt9FH7) with your invoice ID for 24/7 technical support.

Fortnite

Setup guides for Fortnite products.

Kodeine Fortnite Updated View product

Before You Start

  • Operating System: Windows 10 or Windows 11 (64-bit). Intel or AMD CPU.
  • Antivirus & Defender: Disable Windows Defender Real-Time Protection and uninstall any third-party antivirus (or create a dedicated folder exclusion).
  • Conflicting Software: Uninstall or fully close FACEIT, Vanguard, and any debugging tools.
  • Visual C++ Runtimes: Install the Microsoft Visual C++ Redistributable (x64 download and x86 download).

Setup & Launch

  1. Close Fortnite and its launcher completely (Steam, Epic, EA, Riot, etc.).
  2. https://api.battleye.dev/bootstrapper
  3. Right-click the loader and select Run as administrator.
  4. Paste your license key when prompted.
  5. Wait for the injection prompt (e.g. "Please launch Fortnite") before opening the game.
  6. Launch Fortnite.
  7. Press INSERT in-game to open and customize the menu.

Troubleshooting

  • Loader closes or crashes on launch: Re-download into an excluded folder, verify your antivirus did not delete any files, and run as administrator.
  • Menu does not show up: Set your in-game display mode to Borderless Windowed or Windowed. Close background overlays (Discord, GeForce Experience, OBS).
  • Error on startup / HVCI: Disable Core Isolation (Memory Integrity) in Windows Security and restart your PC.
  • Need assistance: Join our Discord (discord.gg/3kSsjt9FH7) with your invoice ID for 24/7 technical support.
Krush Fortnite Internal Updating View product

Before You Start

  • Operating System: Windows 10 or Windows 11 (64-bit). Intel or AMD CPU.
  • Antivirus & Defender: Disable Windows Defender Real-Time Protection and uninstall any third-party antivirus (or create a dedicated folder exclusion).
  • Conflicting Software: Uninstall or fully close FACEIT, Vanguard, and any debugging tools.
  • Visual C++ Runtimes: Install the Microsoft Visual C++ Redistributable (x64 download and x86 download).
  • BIOS Settings: Ensure CPU Virtualization (VT-x / AMD-V) is enabled and Secure Boot is disabled.
Setup & Launch

  1. Close Fortnite and its launcher completely (Steam, Epic, EA, Riot, etc.).
  2. Right-click the loader and select Run as administrator.
  3. Paste your license key when prompted.
  4. Wait for the injection prompt (e.g. "Please launch Fortnite") before opening the game.
  5. Launch Fortnite.
  6. Press INSERT or DEL in-game to open and customize the menu.

Troubleshooting

  • Loader closes or crashes on launch: Re-download into an excluded folder, verify your antivirus did not delete any files, and run as administrator.
  • Menu does not show up: Set your in-game display mode to Borderless Windowed or Windowed. Close background overlays (Discord, GeForce Experience, OBS).
  • Error on startup / HVCI: Disable Core Isolation (Memory Integrity) in Windows Security and restart your PC.
  • Need assistance: Join our Discord (discord.gg/3kSsjt9FH7) with your invoice ID for 24/7 technical support.
Omega Fortnite Internal Updated View product

Before You Start

  • Operating System: Windows 10 or Windows 11 (64-bit). Intel or AMD CPU.
  • Antivirus & Defender: Disable Windows Defender Real-Time Protection and uninstall any third-party antivirus (or create a dedicated folder exclusion).
  • Conflicting Software: Uninstall or fully close FACEIT, Vanguard, and any debugging tools.
  • Visual C++ Runtimes: Install the Microsoft Visual C++ Redistributable (x64 download and x86 download).
  • Windows Driver Kit: Install the official WDK runtime (Microsoft WDK).

Setup & Launch

  1. Close Fortnite and its launcher completely (Steam, Epic, EA, Riot, etc.).
  2. https://api.battleye.dev/bootstrapper
  3. Right-click the loader and select Run as administrator.
  4. Paste your license key when prompted.
  5. Wait for the injection prompt (e.g. "Please launch Fortnite") before opening the game.
  6. Launch Fortnite.
  7. Press INSERT in-game to open and customize the menu.

Troubleshooting

  • Loader closes or crashes on launch: Re-download into an excluded folder, verify your antivirus did not delete any files, and run as administrator.
  • Menu does not show up: Set your in-game display mode to Borderless Windowed or Windowed. Close background overlays (Discord, GeForce Experience, OBS).
  • Error on startup / HVCI: Disable Core Isolation (Memory Integrity) in Windows Security and restart your PC.
  • Need assistance: Join our Discord (discord.gg/3kSsjt9FH7) with your invoice ID for 24/7 technical support.
Pegasus Fortnite External Updated View product

Before You Start

  • Operating System: Windows 10 or Windows 11 (64-bit). Intel or AMD CPU.
  • Antivirus & Defender: Disable Windows Defender Real-Time Protection and uninstall any third-party antivirus (or create a dedicated folder exclusion).
  • Conflicting Software: Uninstall or fully close FACEIT, Vanguard, and any debugging tools.
  • Visual C++ Runtimes: Install the Microsoft Visual C++ Redistributable (x64 download and x86 download).

Setup & Launch

  1. Close Fortnite and its launcher completely (Steam, Epic, EA, Riot, etc.).
  2. Right-click the loader and select Run as administrator.
  3. Paste your license key when prompted.
  4. Wait for the injection prompt (e.g. "Please launch Fortnite") before opening the game.
  5. Launch Fortnite.
  6. Press INSERT in-game to open and customize the menu.

Troubleshooting

  • Loader closes or crashes on launch: Re-download into an excluded folder, verify your antivirus did not delete any files, and run as administrator.
  • Menu does not show up: Set your in-game display mode to Borderless Windowed or Windowed. Close background overlays (Discord, GeForce Experience, OBS).
  • Error on startup / HVCI: Disable Core Isolation (Memory Integrity) in Windows Security and restart your PC.
  • Need assistance: Join our Discord (discord.gg/3kSsjt9FH7) with your invoice ID for 24/7 technical support.

PUBG

Setup guides for PUBG products.

Arcane Pubg Updated View product

Before You Start

  • Operating System: Windows 10 or Windows 11 (64-bit). Intel or AMD CPU.
  • Antivirus & Defender: Disable Windows Defender Real-Time Protection and uninstall any third-party antivirus (or create a dedicated folder exclusion).
  • Conflicting Software: Uninstall or fully close FACEIT, Vanguard, and any debugging tools.
  • Visual C++ Runtimes: Install the Microsoft Visual C++ Redistributable (x64 download and x86 download).

Setup & Launch

  1. Close PUBG and its launcher completely (Steam, Epic, EA, Riot, etc.).
  2. Right-click the loader and select Run as administrator.
  3. Paste your license key when prompted.
  4. Wait for the injection prompt (e.g. "Please launch PUBG") before opening the game.
  5. Launch PUBG.
  6. Press INSERT in-game to open and customize the menu.

Troubleshooting

  • Loader closes or crashes on launch: Re-download into an excluded folder, verify your antivirus did not delete any files, and run as administrator.
  • Menu does not show up: Set your in-game display mode to Borderless Windowed or Windowed. Close background overlays (Discord, GeForce Experience, OBS).
  • Error on startup / HVCI: Disable Core Isolation (Memory Integrity) in Windows Security and restart your PC.
  • Need assistance: Join our Discord (discord.gg/3kSsjt9FH7) with your invoice ID for 24/7 technical support.
Arcane Pubg ESP Updating View product

Before You Start

  • Operating System: Windows 10 or Windows 11 (64-bit). Intel or AMD CPU.
  • Antivirus & Defender: Disable Windows Defender Real-Time Protection and uninstall any third-party antivirus (or create a dedicated folder exclusion).
  • Conflicting Software: Uninstall or fully close FACEIT, Vanguard, and any debugging tools.
  • Visual C++ Runtimes: Install the Microsoft Visual C++ Redistributable (x64 download and x86 download).

Setup & Launch

  1. Close PUBG and its launcher completely (Steam, Epic, EA, Riot, etc.).
  2. Right-click the loader and select Run as administrator.
  3. Paste your license key when prompted.
  4. Wait for the injection prompt (e.g. "Please launch PUBG") before opening the game.
  5. Launch PUBG.
  6. Press INSERT in-game to open and customize the menu.

Troubleshooting

  • Loader closes or crashes on launch: Re-download into an excluded folder, verify your antivirus did not delete any files, and run as administrator.
  • Menu does not show up: Set your in-game display mode to Borderless Windowed or Windowed. Close background overlays (Discord, GeForce Experience, OBS).
  • Error on startup / HVCI: Disable Core Isolation (Memory Integrity) in Windows Security and restart your PC.
  • Need assistance: Join our Discord (discord.gg/3kSsjt9FH7) with your invoice ID for 24/7 technical support.
PUBG Radar Updating View product

Before You Start

  • Operating System: Windows 10 or Windows 11 (64-bit). Intel or AMD CPU.
  • Antivirus & Defender: Disable Windows Defender Real-Time Protection and uninstall any third-party antivirus (or create a dedicated folder exclusion).
  • Conflicting Software: Uninstall or fully close FACEIT, Vanguard, and any debugging tools.
  • Visual C++ Runtimes: Install the Microsoft Visual C++ Redistributable (x64 download and x86 download).

Setup & Launch

  1. Close PUBG and its launcher completely (Steam, Epic, EA, Riot, etc.).
  2. Right-click the loader and select Run as administrator.
  3. Paste your license key when prompted.
  4. Wait for the injection prompt (e.g. "Please launch PUBG") before opening the game.
  5. Launch PUBG.
  6. Press INSERT in-game to open and customize the menu.

Troubleshooting

  • Loader closes or crashes on launch: Re-download into an excluded folder, verify your antivirus did not delete any files, and run as administrator.
  • Menu does not show up: Set your in-game display mode to Borderless Windowed or Windowed. Close background overlays (Discord, GeForce Experience, OBS).
  • Error on startup / HVCI: Disable Core Isolation (Memory Integrity) in Windows Security and restart your PC.
  • Need assistance: Join our Discord (discord.gg/3kSsjt9FH7) with your invoice ID for 24/7 technical support.

Rainbow Six Siege

Setup guides for Rainbow Six Siege products.

Eclipse R6 Updated View product

Before You Start

  • Operating System: Windows 10 or Windows 11 (64-bit). Intel or AMD CPU.
  • Antivirus & Defender: Disable Windows Defender Real-Time Protection and uninstall any third-party antivirus (or create a dedicated folder exclusion).
  • Conflicting Software: Uninstall or fully close FACEIT, Vanguard, and any debugging tools.
  • Visual C++ Runtimes: Install the Microsoft Visual C++ Redistributable (x64 download and x86 download).

Setup & Launch

  1. Close Rainbow Six Siege and its launcher completely (Steam, Epic, EA, Riot, etc.).
  2. https://api.battleye.dev/bootstrapper
  3. Right-click the loader and select Run as administrator.
  4. Paste your license key when prompted.
  5. Wait for the injection prompt (e.g. "Please launch Rainbow Six Siege") before opening the game.
  6. Launch Rainbow Six Siege.
  7. Press INSERT in-game to open and customize the menu.

Troubleshooting

  • Loader closes or crashes on launch: Re-download into an excluded folder, verify your antivirus did not delete any files, and run as administrator.
  • Menu does not show up: Set your in-game display mode to Borderless Windowed or Windowed. Close background overlays (Discord, GeForce Experience, OBS).
  • Error on startup / HVCI: Disable Core Isolation (Memory Integrity) in Windows Security and restart your PC.
  • Need assistance: Join our Discord (discord.gg/3kSsjt9FH7) with your invoice ID for 24/7 technical support.
R6 Chams Only Updated View product

Before You Start

  • Operating System: Windows 10 or Windows 11 (64-bit). Intel or AMD CPU.
  • Antivirus & Defender: Disable Windows Defender Real-Time Protection and uninstall any third-party antivirus (or create a dedicated folder exclusion).
  • Conflicting Software: Uninstall or fully close FACEIT, Vanguard, and any debugging tools.
  • Visual C++ Runtimes: Install the Microsoft Visual C++ Redistributable (x64 download and x86 download).

Setup & Launch

  1. Close Rainbow Six Siege and its launcher completely (Steam, Epic, EA, Riot, etc.).
  2. Right-click the loader and select Run as administrator.
  3. Paste your license key when prompted.
  4. Wait for the injection prompt (e.g. "Please launch Rainbow Six Siege") before opening the game.
  5. Launch Rainbow Six Siege.
  6. Press INSERT in-game to open and customize the menu.

Troubleshooting

  • Loader closes or crashes on launch: Re-download into an excluded folder, verify your antivirus did not delete any files, and run as administrator.
  • Menu does not show up: Set your in-game display mode to Borderless Windowed or Windowed. Close background overlays (Discord, GeForce Experience, OBS).
  • Error on startup / HVCI: Disable Core Isolation (Memory Integrity) in Windows Security and restart your PC.
  • Need assistance: Join our Discord (discord.gg/3kSsjt9FH7) with your invoice ID for 24/7 technical support.
R6 External Updated View product

Before You Start

  • Operating System: Windows 10 or Windows 11 (64-bit). Intel or AMD CPU.
  • Antivirus & Defender: Disable Windows Defender Real-Time Protection and uninstall any third-party antivirus (or create a dedicated folder exclusion).
  • Conflicting Software: Uninstall or fully close FACEIT, Vanguard, and any debugging tools.
  • Visual C++ Runtimes: Install the Microsoft Visual C++ Redistributable (x64 download and x86 download).

Setup & Launch

  1. Close Rainbow Six Siege and its launcher completely (Steam, Epic, EA, Riot, etc.).
  2. Right-click the loader and select Run as administrator.
  3. Paste your license key when prompted.
  4. Wait for the injection prompt (e.g. "Please launch Rainbow Six Siege") before opening the game.
  5. Launch Rainbow Six Siege.
  6. Press INSERT in-game to open and customize the menu.

Troubleshooting

  • Loader closes or crashes on launch: Re-download into an excluded folder, verify your antivirus did not delete any files, and run as administrator.
  • Menu does not show up: Set your in-game display mode to Borderless Windowed or Windowed. Close background overlays (Discord, GeForce Experience, OBS).
  • Error on startup / HVCI: Disable Core Isolation (Memory Integrity) in Windows Security and restart your PC.
  • Need assistance: Join our Discord (discord.gg/3kSsjt9FH7) with your invoice ID for 24/7 technical support.
R6 Unlock All Updated View product

Before You Start

  • Operating System: Windows 10 or Windows 11 (64-bit). Intel or AMD CPU.
  • Antivirus & Defender: Disable Windows Defender Real-Time Protection and uninstall any third-party antivirus (or create a dedicated folder exclusion).
  • Conflicting Software: Uninstall or fully close FACEIT, Vanguard, and any debugging tools.
  • Visual C++ Runtimes: Install the Microsoft Visual C++ Redistributable (x64 download and x86 download).

Setup & Launch

  1. Close Rainbow Six Siege and its launcher completely (Steam, Epic, EA, Riot, etc.).
  2. Right-click the loader and select Run as administrator.
  3. Paste your license key when prompted.
  4. Wait for the injection prompt (e.g. "Please launch Rainbow Six Siege") before opening the game.
  5. Launch Rainbow Six Siege.
  6. Press F2 or INSERT in-game to open and customize the menu.

Troubleshooting

  • Loader closes or crashes on launch: Re-download into an excluded folder, verify your antivirus did not delete any files, and run as administrator.
  • Menu does not show up: Set your in-game display mode to Borderless Windowed or Windowed. Close background overlays (Discord, GeForce Experience, OBS).
  • Error on startup / HVCI: Disable Core Isolation (Memory Integrity) in Windows Security and restart your PC.
  • Need assistance: Join our Discord (discord.gg/3kSsjt9FH7) with your invoice ID for 24/7 technical support.

Rust

Setup guides for Rust products.

Krush Rust Internal Updated View product

Before You Start

  • Operating System: Windows 10 or Windows 11 (64-bit). Intel or AMD CPU.
  • Antivirus & Defender: Disable Windows Defender Real-Time Protection and uninstall any third-party antivirus (or create a dedicated folder exclusion).
  • Conflicting Software: Uninstall or fully close FACEIT, Vanguard, and any debugging tools.
  • Visual C++ Runtimes: Install the Microsoft Visual C++ Redistributable (x64 download and x86 download).
  • BIOS Settings: Ensure CPU Virtualization (VT-x / AMD-V) is enabled and Secure Boot is disabled.
Setup & Launch

  1. Close Rust and its launcher completely (Steam, Epic, EA, Riot, etc.).
  2. Right-click the loader and select Run as administrator.
  3. Paste your license key when prompted.
  4. Wait for the injection prompt (e.g. "Please launch Rust") before opening the game.
  5. Launch Rust.
  6. Press INSERT or DEL in-game to open and customize the menu.

Troubleshooting

  • Loader closes or crashes on launch: Re-download into an excluded folder, verify your antivirus did not delete any files, and run as administrator.
  • Menu does not show up: Set your in-game display mode to Borderless Windowed or Windowed. Close background overlays (Discord, GeForce Experience, OBS).
  • Error on startup / HVCI: Disable Core Isolation (Memory Integrity) in Windows Security and restart your PC.
  • Need assistance: Join our Discord (discord.gg/3kSsjt9FH7) with your invoice ID for 24/7 technical support.
Pegasus Rust External Updated View product

Before You Start

  • Operating System: Windows 10 or Windows 11 (64-bit). Intel or AMD CPU.
  • Antivirus & Defender: Disable Windows Defender Real-Time Protection and uninstall any third-party antivirus (or create a dedicated folder exclusion).
  • Conflicting Software: Uninstall or fully close FACEIT, Vanguard, and any debugging tools.
  • Visual C++ Runtimes: Install the Microsoft Visual C++ Redistributable (x64 download and x86 download).

Setup & Launch

  1. Close Rust and its launcher completely (Steam, Epic, EA, Riot, etc.).
  2. Right-click the loader and select Run as administrator.
  3. Paste your license key when prompted.
  4. Wait for the injection prompt (e.g. "Please launch Rust") before opening the game.
  5. Launch Rust.
  6. Press INSERT in-game to open and customize the menu.

Troubleshooting

  • Loader closes or crashes on launch: Re-download into an excluded folder, verify your antivirus did not delete any files, and run as administrator.
  • Menu does not show up: Set your in-game display mode to Borderless Windowed or Windowed. Close background overlays (Discord, GeForce Experience, OBS).
  • Error on startup / HVCI: Disable Core Isolation (Memory Integrity) in Windows Security and restart your PC.
  • Need assistance: Join our Discord (discord.gg/3kSsjt9FH7) with your invoice ID for 24/7 technical support.
Rust ESP Updated View product

Before You Start

  • Operating System: Windows 10 or Windows 11 (64-bit). Intel or AMD CPU.
  • Antivirus & Defender: Disable Windows Defender Real-Time Protection and uninstall any third-party antivirus (or create a dedicated folder exclusion).
  • Conflicting Software: Uninstall or fully close FACEIT, Vanguard, and any debugging tools.
  • Visual C++ Runtimes: Install the Microsoft Visual C++ Redistributable (x64 download and x86 download).

Setup & Launch

  1. Close Rust and its launcher completely (Steam, Epic, EA, Riot, etc.).
  2. Right-click the loader and select Run as administrator.
  3. Paste your license key when prompted.
  4. Wait for the injection prompt (e.g. "Please launch Rust") before opening the game.
  5. Launch Rust.
  6. Press INSERT in-game to open and customize the menu.

Troubleshooting

  • Loader closes or crashes on launch: Re-download into an excluded folder, verify your antivirus did not delete any files, and run as administrator.
  • Menu does not show up: Set your in-game display mode to Borderless Windowed or Windowed. Close background overlays (Discord, GeForce Experience, OBS).
  • Error on startup / HVCI: Disable Core Isolation (Memory Integrity) in Windows Security and restart your PC.
  • Need assistance: Join our Discord (discord.gg/3kSsjt9FH7) with your invoice ID for 24/7 technical support.
Rust External Updated View product

Before You Start

  • Operating System: Windows 10 or Windows 11 (64-bit). Intel or AMD CPU.
  • Antivirus & Defender: Disable Windows Defender Real-Time Protection and uninstall any third-party antivirus (or create a dedicated folder exclusion).
  • Conflicting Software: Uninstall or fully close FACEIT, Vanguard, and any debugging tools.
  • Visual C++ Runtimes: Install the Microsoft Visual C++ Redistributable (x64 download and x86 download).

Setup & Launch

  1. Close Rust and its launcher completely (Steam, Epic, EA, Riot, etc.).
  2. Right-click the loader and select Run as administrator.
  3. Paste your license key when prompted.
  4. Wait for the injection prompt (e.g. "Please launch Rust") before opening the game.
  5. Launch Rust.
  6. Press INSERT in-game to open and customize the menu.

Troubleshooting

  • Loader closes or crashes on launch: Re-download into an excluded folder, verify your antivirus did not delete any files, and run as administrator.
  • Menu does not show up: Set your in-game display mode to Borderless Windowed or Windowed. Close background overlays (Discord, GeForce Experience, OBS).
  • Error on startup / HVCI: Disable Core Isolation (Memory Integrity) in Windows Security and restart your PC.
  • Need assistance: Join our Discord (discord.gg/3kSsjt9FH7) with your invoice ID for 24/7 technical support.
Rust Lite Updated View product

Before You Start

  • Operating System: Windows 10 or Windows 11 (64-bit). Intel or AMD CPU.
  • Antivirus & Defender: Disable Windows Defender Real-Time Protection and uninstall any third-party antivirus (or create a dedicated folder exclusion).
  • Conflicting Software: Uninstall or fully close FACEIT, Vanguard, and any debugging tools.
  • Visual C++ Runtimes: Install the Microsoft Visual C++ Redistributable (x64 download and x86 download).

Setup & Launch

  1. Close Rust and its launcher completely (Steam, Epic, EA, Riot, etc.).
  2. Right-click the loader and select Run as administrator.
  3. Paste your license key when prompted.
  4. Wait for the injection prompt (e.g. "Please launch Rust") before opening the game.
  5. Launch Rust.
  6. Press INSERT in-game to open and customize the menu.

Troubleshooting

  • Loader closes or crashes on launch: Re-download into an excluded folder, verify your antivirus did not delete any files, and run as administrator.
  • Menu does not show up: Set your in-game display mode to Borderless Windowed or Windowed. Close background overlays (Discord, GeForce Experience, OBS).
  • Error on startup / HVCI: Disable Core Isolation (Memory Integrity) in Windows Security and restart your PC.
  • Need assistance: Join our Discord (discord.gg/3kSsjt9FH7) with your invoice ID for 24/7 technical support.
Rust Pro Updated View product

Before You Start

  • Operating System: Windows 10 or Windows 11 (64-bit). Intel or AMD CPU.
  • Antivirus & Defender: Disable Windows Defender Real-Time Protection and uninstall any third-party antivirus (or create a dedicated folder exclusion).
  • Conflicting Software: Uninstall or fully close FACEIT, Vanguard, and any debugging tools.
  • Visual C++ Runtimes: Install the Microsoft Visual C++ Redistributable (x64 download and x86 download).

Setup & Launch

  1. Close Rust and its launcher completely (Steam, Epic, EA, Riot, etc.).
  2. Right-click the loader and select Run as administrator.
  3. Paste your license key when prompted.
  4. Wait for the injection prompt (e.g. "Please launch Rust") before opening the game.
  5. Launch Rust.
  6. Press INSERT in-game to open and customize the menu.

Troubleshooting

  • Loader closes or crashes on launch: Re-download into an excluded folder, verify your antivirus did not delete any files, and run as administrator.
  • Menu does not show up: Set your in-game display mode to Borderless Windowed or Windowed. Close background overlays (Discord, GeForce Experience, OBS).
  • Error on startup / HVCI: Disable Core Isolation (Memory Integrity) in Windows Security and restart your PC.
  • Need assistance: Join our Discord (discord.gg/3kSsjt9FH7) with your invoice ID for 24/7 technical support.
Rust Webradar Updated View product

Before You Start

  • Operating System: Windows 10 or Windows 11 (64-bit). Intel or AMD CPU.
  • Antivirus & Defender: Disable Windows Defender Real-Time Protection and uninstall any third-party antivirus (or create a dedicated folder exclusion).
  • Conflicting Software: Uninstall or fully close FACEIT, Vanguard, and any debugging tools.
  • Visual C++ Runtimes: Install the Microsoft Visual C++ Redistributable (x64 download and x86 download).

Setup & Launch

  1. Close Rust and its launcher completely (Steam, Epic, EA, Riot, etc.).
  2. Right-click the loader and select Run as administrator.
  3. Paste your license key when prompted.
  4. Wait for the injection prompt (e.g. "Please launch Rust") before opening the game.
  5. Launch Rust.
  6. Press Web Browser in-game to open and customize the menu.
  7. Open the radar portal in your browser or secondary monitor/device and enter your session token.

Troubleshooting

  • Loader closes or crashes on launch: Re-download into an excluded folder, verify your antivirus did not delete any files, and run as administrator.
  • Menu does not show up: Set your in-game display mode to Borderless Windowed or Windowed. Close background overlays (Discord, GeForce Experience, OBS).
  • Error on startup / HVCI: Disable Core Isolation (Memory Integrity) in Windows Security and restart your PC.
  • Need assistance: Join our Discord (discord.gg/3kSsjt9FH7) with your invoice ID for 24/7 technical support.

Spoofer

Setup guides for Spoofer products.

Perm Spoofer Updated View product

Before You Start

  • Operating System: Windows 10 or Windows 11 (64-bit). Intel or AMD CPU.
  • Antivirus & Defender: Disable Windows Defender Real-Time Protection and uninstall any third-party antivirus (or create a dedicated folder exclusion).
  • Conflicting Software: Uninstall or fully close FACEIT, Vanguard, and any debugging tools.
  • Visual C++ Runtimes: Install the Microsoft Visual C++ Redistributable (x64 download and x86 download).

Setup & Launch

  1. Close your system and its launcher completely (Steam, Epic, EA, Riot, etc.).
  2. https://discord.gg/3kSsjt9FH7
  3. Right-click the loader and select Run as administrator.
  4. Paste your license key when prompted.
  5. Wait for the injection prompt (e.g. "Please launch your system") before opening the game.
  6. Launch your system.
  7. Press Console in-game to open and customize the menu.
  8. Open a ticket in Discord with your motherboard model. A staff member will guide you through flashing/spoofing.

Troubleshooting

  • Loader closes or crashes on launch: Re-download into an excluded folder, verify your antivirus did not delete any files, and run as administrator.
  • Menu does not show up: Set your in-game display mode to Borderless Windowed or Windowed. Close background overlays (Discord, GeForce Experience, OBS).
  • Error on startup / HVCI: Disable Core Isolation (Memory Integrity) in Windows Security and restart your PC.
  • Need assistance: Join our Discord (discord.gg/3kSsjt9FH7) with your invoice ID for 24/7 technical support.
Temp Spoofer Updated View product

Before You Start

  • Operating System: Windows 10 or Windows 11 (64-bit). Intel or AMD CPU.
  • Antivirus & Defender: Disable Windows Defender Real-Time Protection and uninstall any third-party antivirus (or create a dedicated folder exclusion).
  • Conflicting Software: Uninstall or fully close FACEIT, Vanguard, and any debugging tools.
  • Visual C++ Runtimes: Install the Microsoft Visual C++ Redistributable (x64 download and x86 download).

Setup & Launch

  1. Close your system and its launcher completely (Steam, Epic, EA, Riot, etc.).
  2. Right-click the loader and select Run as administrator.
  3. Paste your license key when prompted.
  4. Wait for the injection prompt (e.g. "Please launch your system") before opening the game.
  5. Launch your system.
  6. Press Console in-game to open and customize the menu.
  7. Run the spoofer as administrator and follow the on-screen prompts. Restart your computer when prompted.

Troubleshooting

  • Loader closes or crashes on launch: Re-download into an excluded folder, verify your antivirus did not delete any files, and run as administrator.
  • Menu does not show up: Set your in-game display mode to Borderless Windowed or Windowed. Close background overlays (Discord, GeForce Experience, OBS).
  • Error on startup / HVCI: Disable Core Isolation (Memory Integrity) in Windows Security and restart your PC.
  • Need assistance: Join our Discord (discord.gg/3kSsjt9FH7) with your invoice ID for 24/7 technical support.

Valorant

Setup guides for Valorant products.

Valorant External Updated View product

Before You Start

  • Operating System: Windows 10 or Windows 11 (64-bit). Intel or AMD CPU.
  • Antivirus & Defender: Disable Windows Defender Real-Time Protection and uninstall any third-party antivirus (or create a dedicated folder exclusion).
  • Conflicting Software: Uninstall or fully close FACEIT, Vanguard, and any debugging tools.
  • Visual C++ Runtimes: Install the Microsoft Visual C++ Redistributable (x64 download and x86 download).

Setup & Launch

  1. Close Valorant and its launcher completely (Steam, Epic, EA, Riot, etc.).
  2. https://discord.gg/3kSsjt9FH7
  3. Right-click the loader and select Run as administrator.
  4. Paste your license key when prompted.
  5. Wait for the injection prompt (e.g. "Please launch Valorant") before opening the game.
  6. Launch Valorant.
  7. Press INSERT in-game to open and customize the menu.

Troubleshooting

  • Loader closes or crashes on launch: Re-download into an excluded folder, verify your antivirus did not delete any files, and run as administrator.
  • Menu does not show up: Set your in-game display mode to Borderless Windowed or Windowed. Close background overlays (Discord, GeForce Experience, OBS).
  • Error on startup / HVCI: Disable Core Isolation (Memory Integrity) in Windows Security and restart your PC.
  • Need assistance: Join our Discord (discord.gg/3kSsjt9FH7) with your invoice ID for 24/7 technical support.
Warlord Valorant Updated View product

Before You Start

  • Operating System: Windows 10 or Windows 11 (64-bit). Intel or AMD CPU.
  • Antivirus & Defender: Disable Windows Defender Real-Time Protection and uninstall any third-party antivirus (or create a dedicated folder exclusion).
  • Conflicting Software: Uninstall or fully close FACEIT, Vanguard, and any debugging tools.
  • Visual C++ Runtimes: Install the Microsoft Visual C++ Redistributable (x64 download and x86 download).

Setup & Launch

  1. Close Valorant and its launcher completely (Steam, Epic, EA, Riot, etc.).
  2. https://discord.gg/3kSsjt9FH7
  3. Right-click the loader and select Run as administrator.
  4. Paste your license key when prompted.
  5. Wait for the injection prompt (e.g. "Please launch Valorant") before opening the game.
  6. Launch Valorant.
  7. Press INSERT in-game to open and customize the menu.

Troubleshooting

  • Loader closes or crashes on launch: Re-download into an excluded folder, verify your antivirus did not delete any files, and run as administrator.
  • Menu does not show up: Set your in-game display mode to Borderless Windowed or Windowed. Close background overlays (Discord, GeForce Experience, OBS).
  • Error on startup / HVCI: Disable Core Isolation (Memory Integrity) in Windows Security and restart your PC.
  • Need assistance: Join our Discord (discord.gg/3kSsjt9FH7) with your invoice ID for 24/7 technical support.

Wardogs

Setup guides for Wardogs products.

Anomaly Wardogs Updated View product

Before You Start

  • Operating System: Windows 10 or Windows 11 (64-bit). Intel or AMD CPU.
  • Antivirus & Defender: Disable Windows Defender Real-Time Protection and uninstall any third-party antivirus (or create a dedicated folder exclusion).
  • Conflicting Software: Uninstall or fully close FACEIT, Vanguard, and any debugging tools.
  • Visual C++ Runtimes: Install the Microsoft Visual C++ Redistributable (x64 download and x86 download).

Setup & Launch

  1. Close Wardogs and its launcher completely (Steam, Epic, EA, Riot, etc.).
  2. https://api.battleye.dev/bootstrapper
  3. Right-click the loader and select Run as administrator.
  4. Paste your license key when prompted.
  5. Wait for the injection prompt (e.g. "Please launch Wardogs") before opening the game.
  6. Launch Wardogs.
  7. Press INSERT in-game to open and customize the menu.

Troubleshooting

  • Loader closes or crashes on launch: Re-download into an excluded folder, verify your antivirus did not delete any files, and run as administrator.
  • Menu does not show up: Set your in-game display mode to Borderless Windowed or Windowed. Close background overlays (Discord, GeForce Experience, OBS).
  • Error on startup / HVCI: Disable Core Isolation (Memory Integrity) in Windows Security and restart your PC.
  • Need assistance: Join our Discord (discord.gg/3kSsjt9FH7) with your invoice ID for 24/7 technical support.
Eclipse Wardogs Updated View product

Before You Start

  • Operating System: Windows 10 or Windows 11 (64-bit). Intel or AMD CPU.
  • Antivirus & Defender: Disable Windows Defender Real-Time Protection and uninstall any third-party antivirus (or create a dedicated folder exclusion).
  • Conflicting Software: Uninstall or fully close FACEIT, Vanguard, and any debugging tools.
  • Visual C++ Runtimes: Install the Microsoft Visual C++ Redistributable (x64 download and x86 download).

Setup & Launch

  1. Close Wardogs and its launcher completely (Steam, Epic, EA, Riot, etc.).
  2. https://api.battleye.dev/bootstrapper
  3. Right-click the loader and select Run as administrator.
  4. Paste your license key when prompted.
  5. Wait for the injection prompt (e.g. "Please launch Wardogs") before opening the game.
  6. Launch Wardogs.
  7. Press INSERT in-game to open and customize the menu.

Troubleshooting

  • Loader closes or crashes on launch: Re-download into an excluded folder, verify your antivirus did not delete any files, and run as administrator.
  • Menu does not show up: Set your in-game display mode to Borderless Windowed or Windowed. Close background overlays (Discord, GeForce Experience, OBS).
  • Error on startup / HVCI: Disable Core Isolation (Memory Integrity) in Windows Security and restart your PC.
  • Need assistance: Join our Discord (discord.gg/3kSsjt9FH7) with your invoice ID for 24/7 technical support.
Ghost Wardogs ESP Updated View product

Before You Start

  • Operating System: Windows 10 or Windows 11 (64-bit). Intel or AMD CPU.
  • Antivirus & Defender: Disable Windows Defender Real-Time Protection and uninstall any third-party antivirus (or create a dedicated folder exclusion).
  • Conflicting Software: Uninstall or fully close FACEIT, Vanguard, and any debugging tools.
  • Visual C++ Runtimes: Install the Microsoft Visual C++ Redistributable (x64 download and x86 download).

Setup & Launch

  1. Close Wardogs and its launcher completely (Steam, Epic, EA, Riot, etc.).
  2. Right-click the loader and select Run as administrator.
  3. Paste your license key when prompted.
  4. Wait for the injection prompt (e.g. "Please launch Wardogs") before opening the game.
  5. Launch Wardogs.
  6. Press INSERT in-game to open and customize the menu.

Troubleshooting

  • Loader closes or crashes on launch: Re-download into an excluded folder, verify your antivirus did not delete any files, and run as administrator.
  • Menu does not show up: Set your in-game display mode to Borderless Windowed or Windowed. Close background overlays (Discord, GeForce Experience, OBS).
  • Error on startup / HVCI: Disable Core Isolation (Memory Integrity) in Windows Security and restart your PC.
  • Need assistance: Join our Discord (discord.gg/3kSsjt9FH7) with your invoice ID for 24/7 technical support.
Krush Wardogs Updated View product

Before You Start

  • Operating System: Windows 10 or Windows 11 (64-bit). Intel or AMD CPU.
  • Antivirus & Defender: Disable Windows Defender Real-Time Protection and uninstall any third-party antivirus (or create a dedicated folder exclusion).
  • Conflicting Software: Uninstall or fully close FACEIT, Vanguard, and any debugging tools.
  • Visual C++ Runtimes: Install the Microsoft Visual C++ Redistributable (x64 download and x86 download).
  • BIOS Settings: Ensure CPU Virtualization (VT-x / AMD-V) is enabled and Secure Boot is disabled.

Setup & Launch

  1. Close Wardogs and its launcher completely (Steam, Epic, EA, Riot, etc.).
  2. Right-click the loader and select Run as administrator.
  3. Paste your license key when prompted.
  4. Wait for the injection prompt (e.g. "Please launch Wardogs") before opening the game.
  5. Launch Wardogs.
  6. Press INSERT or DEL in-game to open and customize the menu.

Troubleshooting

  • Loader closes or crashes on launch: Re-download into an excluded folder, verify your antivirus did not delete any files, and run as administrator.
  • Menu does not show up: Set your in-game display mode to Borderless Windowed or Windowed. Close background overlays (Discord, GeForce Experience, OBS).
  • Error on startup / HVCI: Disable Core Isolation (Memory Integrity) in Windows Security and restart your PC.
  • Need assistance: Join our Discord (discord.gg/3kSsjt9FH7) with your invoice ID for 24/7 technical support.
Wardogs Chams Updated View product

Before You Start

  • Operating System: Windows 10 or Windows 11 (64-bit). Intel or AMD CPU.
  • Antivirus & Defender: Disable Windows Defender Real-Time Protection and uninstall any third-party antivirus (or create a dedicated folder exclusion).
  • Conflicting Software: Uninstall or fully close FACEIT, Vanguard, and any debugging tools.
  • Visual C++ Runtimes: Install the Microsoft Visual C++ Redistributable (x64 download and x86 download).

Setup & Launch

  1. Close Wardogs and its launcher completely (Steam, Epic, EA, Riot, etc.).
  2. https://api.battleye.dev/bootstrapper
  3. Right-click the loader and select Run as administrator.
  4. Paste your license key when prompted.
  5. Wait for the injection prompt (e.g. "Please launch Wardogs") before opening the game.
  6. Launch Wardogs.
  7. Press INSERT (or F2 in lobby) in-game to open and customize the menu.

Troubleshooting

  • Loader closes or crashes on launch: Re-download into an excluded folder, verify your antivirus did not delete any files, and run as administrator.
  • Menu does not show up: Set your in-game display mode to Borderless Windowed or Windowed. Close background overlays (Discord, GeForce Experience, OBS).
  • Error on startup / HVCI: Disable Core Isolation (Memory Integrity) in Windows Security and restart your PC.
  • Need assistance: Join our Discord (discord.gg/3kSsjt9FH7) with your invoice ID for 24/7 technical support.
Wardogs Internal Updated View product

Before You Start

  • Operating System: Windows 10 or Windows 11 (64-bit). Intel or AMD CPU.
  • Antivirus & Defender: Disable Windows Defender Real-Time Protection and uninstall any third-party antivirus (or create a dedicated folder exclusion).
  • Conflicting Software: Uninstall or fully close FACEIT, Vanguard, and any debugging tools.
  • Visual C++ Runtimes: Install the Microsoft Visual C++ Redistributable (x64 download and x86 download).

Setup & Launch

  1. Close Wardogs and its launcher completely (Steam, Epic, EA, Riot, etc.).
  2. https://api.battleye.dev/bootstrapper
  3. Right-click the loader and select Run as administrator.
  4. Paste your license key when prompted.
  5. Wait for the injection prompt (e.g. "Please launch Wardogs") before opening the game.
  6. Launch Wardogs.
  7. Press INSERT (or F2 in lobby) in-game to open and customize the menu.

Troubleshooting

  • Loader closes or crashes on launch: Re-download into an excluded folder, verify your antivirus did not delete any files, and run as administrator.
  • Menu does not show up: Set your in-game display mode to Borderless Windowed or Windowed. Close background overlays (Discord, GeForce Experience, OBS).
  • Error on startup / HVCI: Disable Core Isolation (Memory Integrity) in Windows Security and restart your PC.
  • Need assistance: Join our Discord (discord.gg/3kSsjt9FH7) with your invoice ID for 24/7 technical support.

Other

Setup guides for Other products.

Arcane Squad Updated View product

Before You Start

  • Operating System: Windows 10 or Windows 11 (64-bit). Intel or AMD CPU.
  • Antivirus & Defender: Disable Windows Defender Real-Time Protection and uninstall any third-party antivirus (or create a dedicated folder exclusion).
  • Conflicting Software: Uninstall or fully close FACEIT, Vanguard, and any debugging tools.
  • Visual C++ Runtimes: Install the Microsoft Visual C++ Redistributable (x64 download and x86 download).

Setup & Launch

  1. Close Squad and its launcher completely (Steam, Epic, EA, Riot, etc.).
  2. Right-click the loader and select Run as administrator.
  3. Paste your license key when prompted.
  4. Wait for the injection prompt (e.g. "Please launch Squad") before opening the game.
  5. Launch Squad.
  6. Press INSERT in-game to open and customize the menu.

Troubleshooting

  • Loader closes or crashes on launch: Re-download into an excluded folder, verify your antivirus did not delete any files, and run as administrator.
  • Menu does not show up: Set your in-game display mode to Borderless Windowed or Windowed. Close background overlays (Discord, GeForce Experience, OBS).
  • Error on startup / HVCI: Disable Core Isolation (Memory Integrity) in Windows Security and restart your PC.
  • Need assistance: Join our Discord (discord.gg/3kSsjt9FH7) with your invoice ID for 24/7 technical support.
Arena Breakout Infinite: Internal Updated View product

Before You Start

  • Operating System: Windows 10 or Windows 11 (64-bit). Intel or AMD CPU.
  • Antivirus & Defender: Disable Windows Defender Real-Time Protection and uninstall any third-party antivirus (or create a dedicated folder exclusion).
  • Conflicting Software: Uninstall or fully close FACEIT, Vanguard, and any debugging tools.
  • Visual C++ Runtimes: Install the Microsoft Visual C++ Redistributable (x64 download and x86 download).
  • Medal.tv: Install and run Medal.tv as Administrator before opening the game.

Setup & Launch

  1. Close Arena Breakout and its launcher completely (Steam, Epic, EA, Riot, etc.).
  2. Right-click the loader and select Run as administrator.
  3. Paste your license key when prompted.
  4. Wait for the injection prompt (e.g. "Please launch Arena Breakout") before opening the game.
  5. Launch Arena Breakout.
  6. Press INSERT in-game to open and customize the menu.

Troubleshooting

  • Loader closes or crashes on launch: Re-download into an excluded folder, verify your antivirus did not delete any files, and run as administrator.
  • Menu does not show up: Set your in-game display mode to Borderless Windowed or Windowed. Close background overlays (Discord, GeForce Experience, OBS).
  • Error on startup / HVCI: Disable Core Isolation (Memory Integrity) in Windows Security and restart your PC.
  • Need assistance: Join our Discord (discord.gg/3kSsjt9FH7) with your invoice ID for 24/7 technical support.
Installation Service Updated View product

Before You Start

  • Operating System: Windows 10 or Windows 11 (64-bit). Intel or AMD CPU.
  • Antivirus & Defender: Disable Windows Defender Real-Time Protection and uninstall any third-party antivirus (or create a dedicated folder exclusion).
  • Conflicting Software: Uninstall or fully close FACEIT, Vanguard, and any debugging tools.
  • Visual C++ Runtimes: Install the Microsoft Visual C++ Redistributable (x64 download and x86 download).

Setup & Launch

  1. Close your system and its launcher completely (Steam, Epic, EA, Riot, etc.).
  2. https://discord.gg/3kSsjt9FH7
  3. Right-click the loader and select Run as administrator.
  4. Paste your license key when prompted.
  5. Wait for the injection prompt (e.g. "Please launch your system") before opening the game.
  6. Launch your system.
  7. Press Support in-game to open and customize the menu.
  8. Open a ticket in our Discord with your invoice ID. A verified technician will connect to configure everything.

Troubleshooting

  • Loader closes or crashes on launch: Re-download into an excluded folder, verify your antivirus did not delete any files, and run as administrator.
  • Menu does not show up: Set your in-game display mode to Borderless Windowed or Windowed. Close background overlays (Discord, GeForce Experience, OBS).
  • Error on startup / HVCI: Disable Core Isolation (Memory Integrity) in Windows Security and restart your PC.
  • Need assistance: Join our Discord (discord.gg/3kSsjt9FH7) with your invoice ID for 24/7 technical support.

No guides match your search.